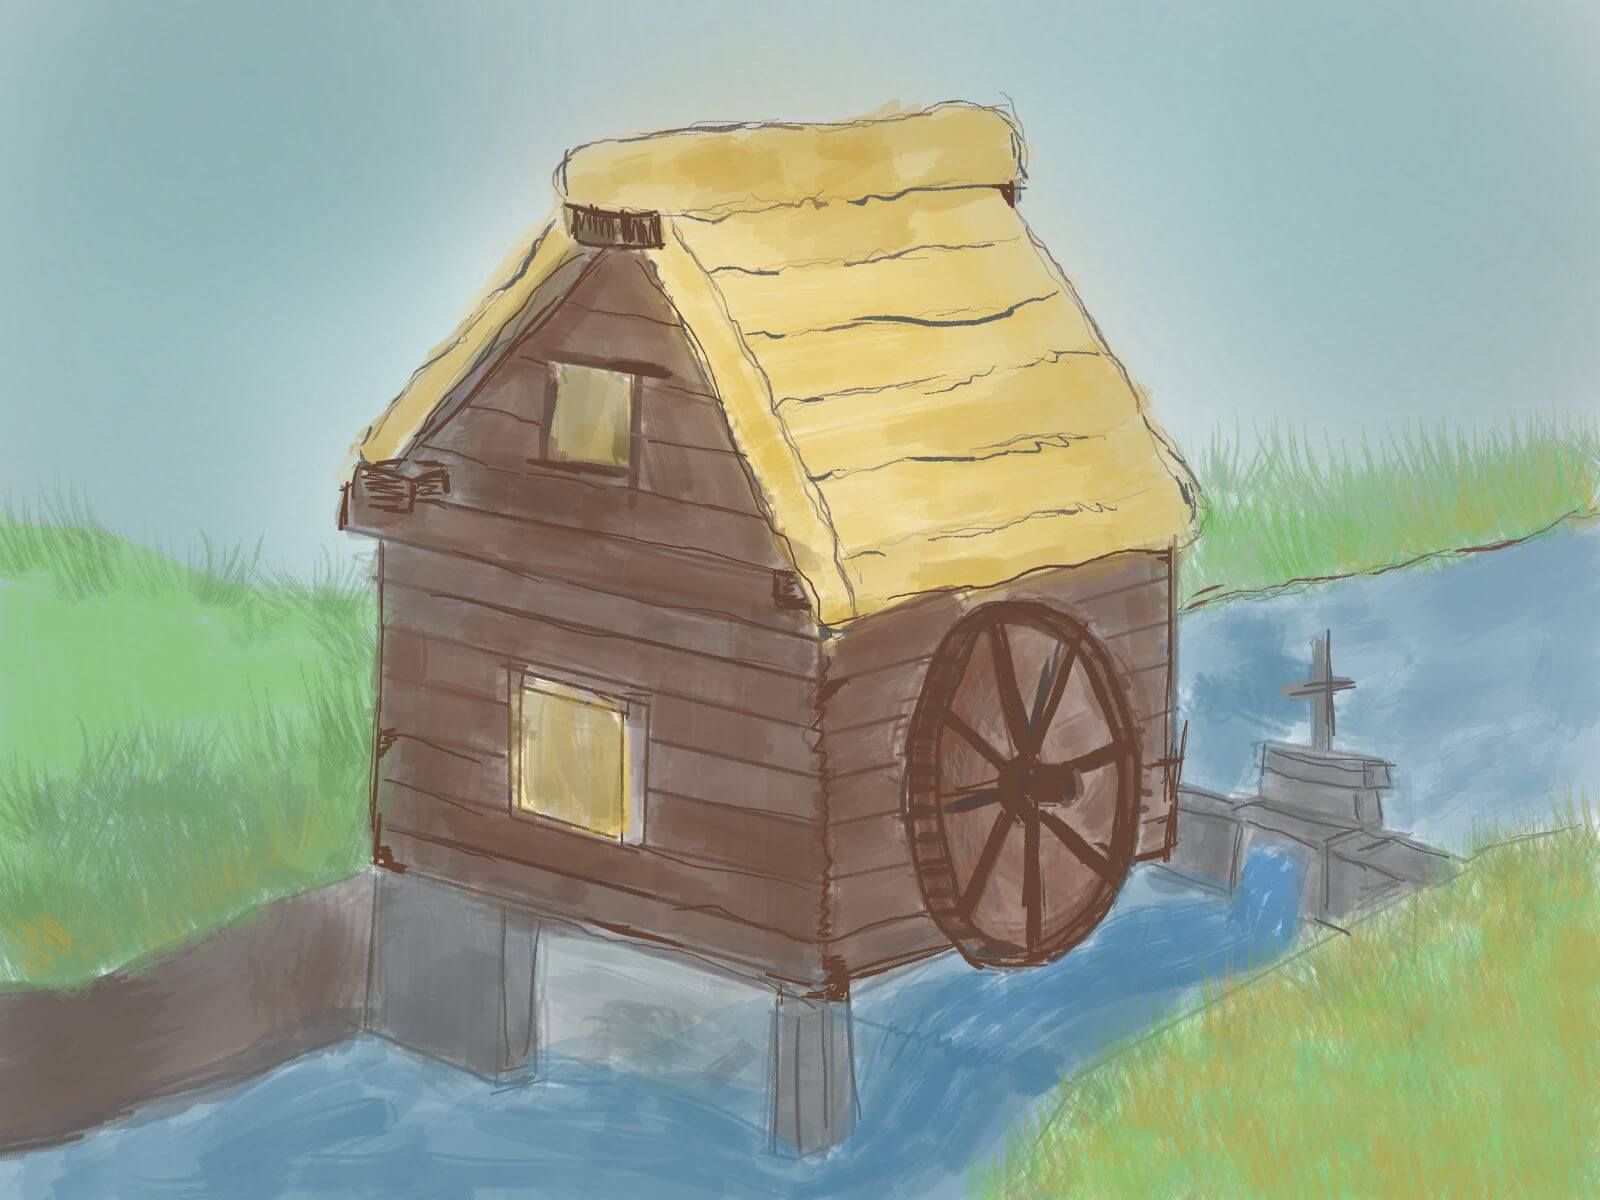
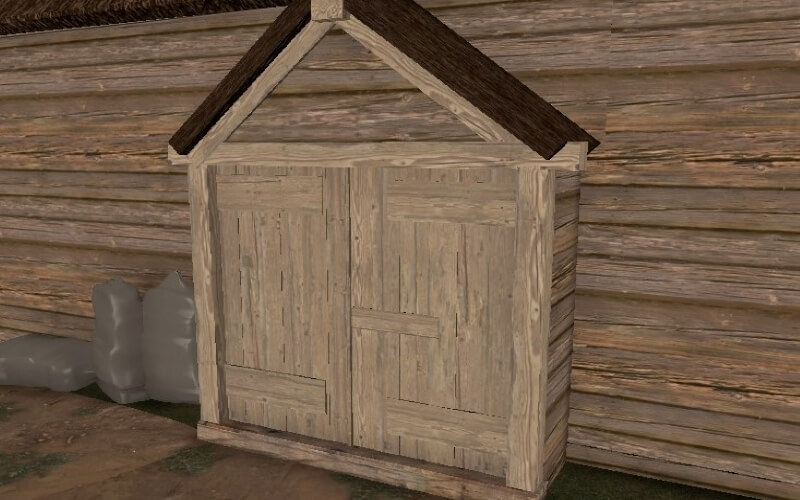
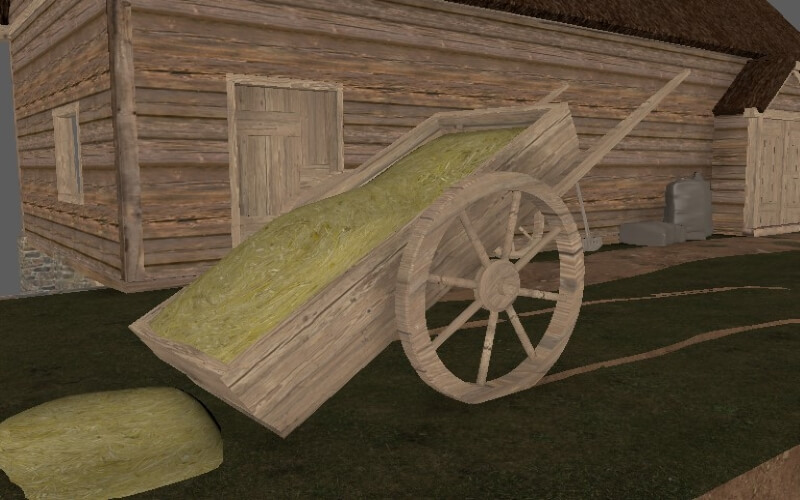
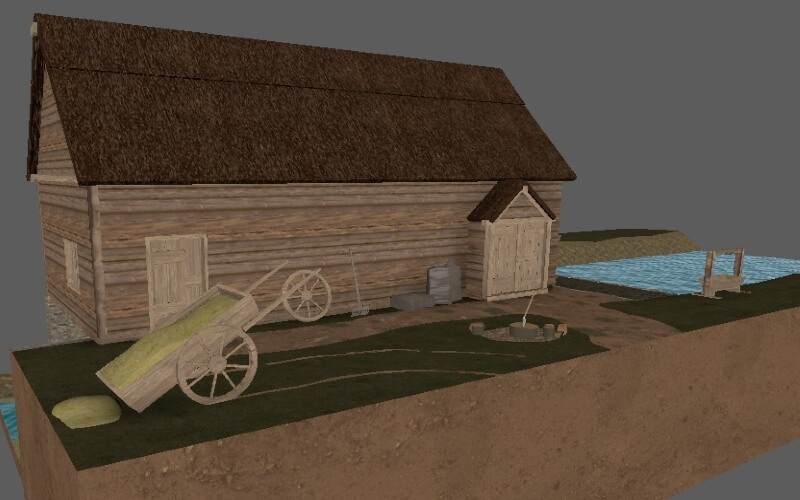
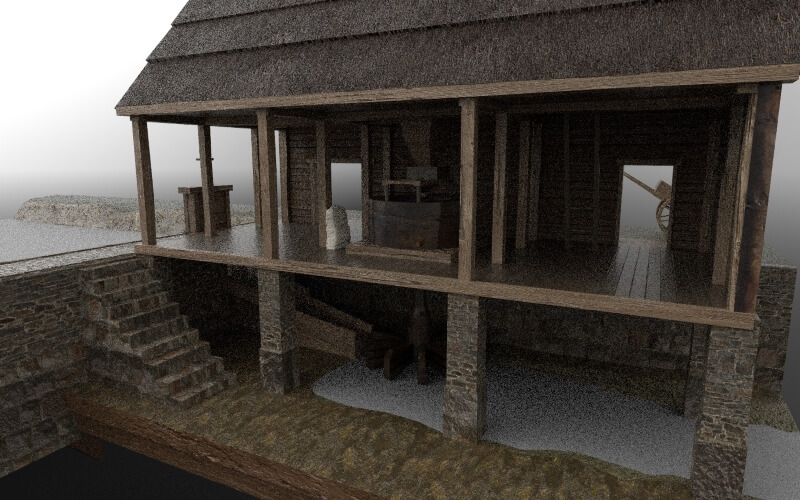
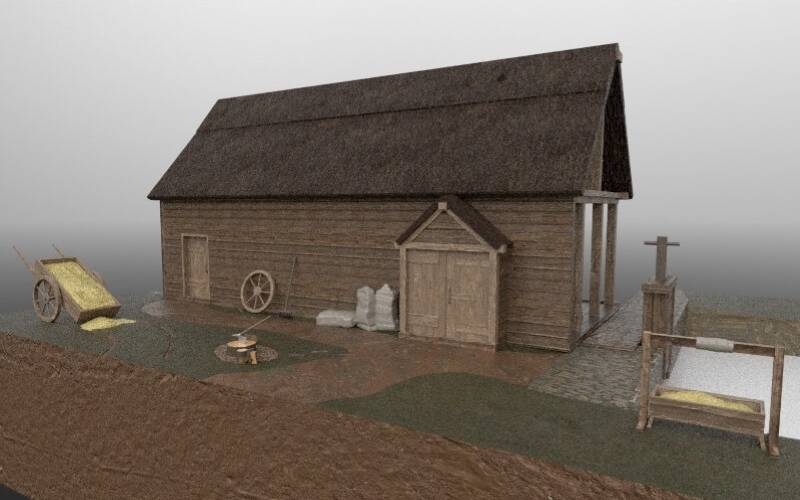
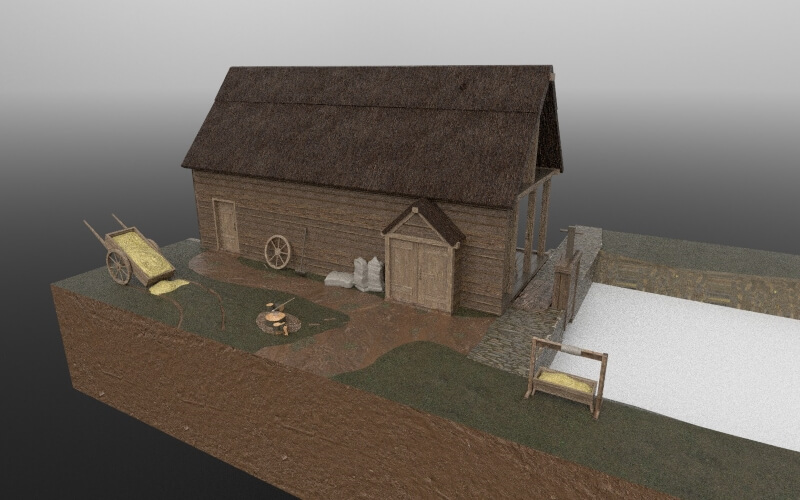
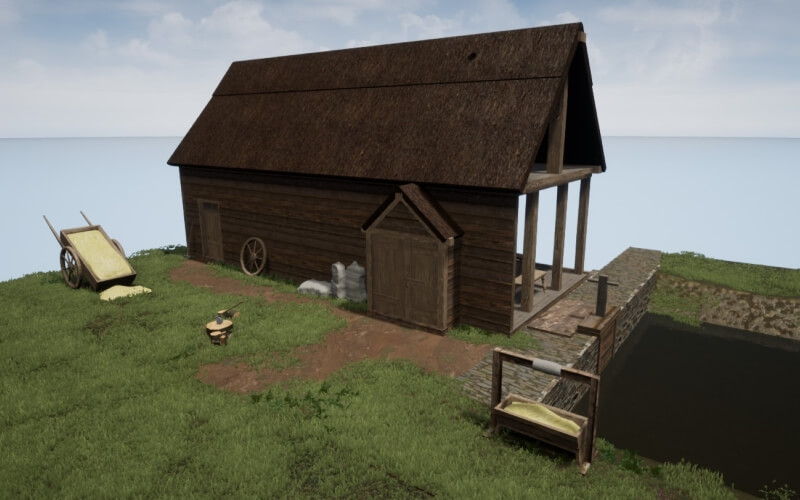
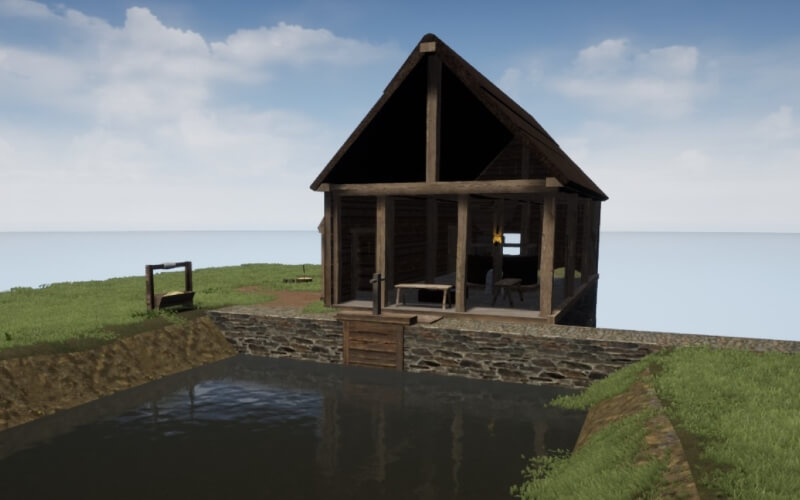
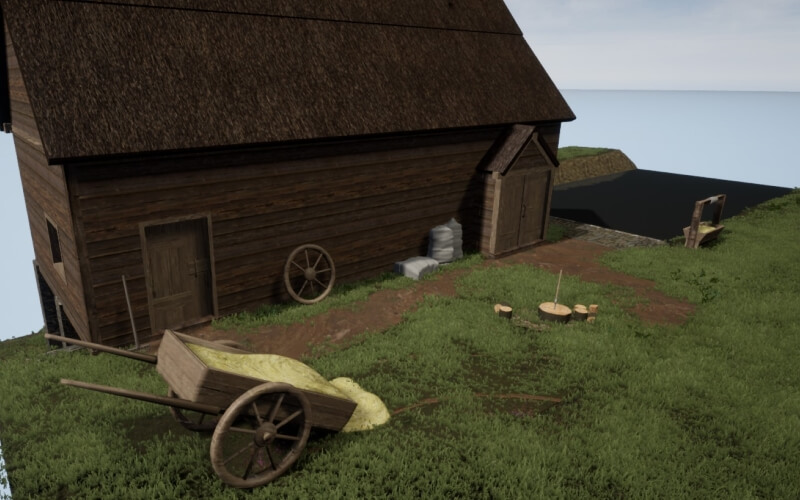
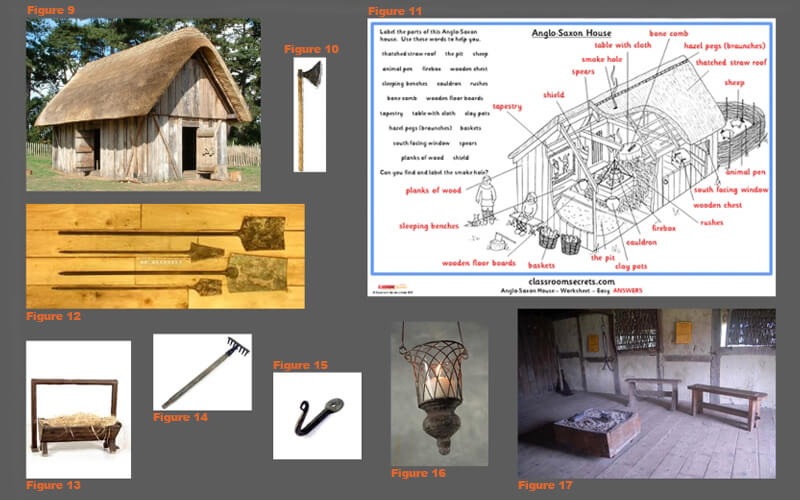
Saxon Mill / Final Project.

For my final work I have undertaken a client project called ‘Explore Malmesbury’. The projects objective is to increase footfall and dwell time in around Malmesbury with informative and engaging stories of the town’s history. The brief I will be following, will be to recreate a Saxon water powered mill in 3D software with animations showing the internal workings of the mill as well as a detailed exterior of the building.


Project time: Jan-Apr 2021

Final Render / front of Saxon Mill


1) Project Planning

Before starting this project, I created a Trello board with a schedule for the different areas I would focus on each week of the semester, with goals for things I wanted to learn as I progress. I first created the schedule, which just briefly outlines my aims for each week of the semester with the first week focusing purely on research. I decided to make an extra section on the board for the research part, with further goals for what I wanted to collect in the form of images or text to help aid my designs later for the Saxon Mill. Other than this I had also included set tasks for what I wanted to learn while working on the project such as animation, texturing, and rendering. Even if it does not contribute fully to the final version of the Mill, I wanted to have these objectives here to refer to in case I had time to learn them. I then would be able to contribute this into the main goals I had made for the project at the end of my Trello board.


2) Project research

I began by first researching the types of mills from the Saxon time. From this I found drawings and diagrams of what they would have perhaps looked like. My recreation will not be 100% accurate to how the mills were made, as there are no Saxon mills remaining today as references, only drawings, which gives me a little creative freedom to the project. The research suggests that most of the mills then would have been horizontal rather than vertical.The horizontal mill and animation shall be the first area of the project I will look at constructing in 3D software.


Figure 1:
Fullerton Romano British mill reconstruction by Bob Spain / This is showing internal workings of the hopper and grinder attached with cogs to a vertical wheeled Mill / Link to book where image was sourced: https://historicengland.org.uk/images-books/publications/iha-mills/heag212-mills/

Figure 2:
Horizontal mill based on post medieval example from Lewis, Hebrides / Link to book where image was sourced: https://historicengland.org.uk/images-books/publications/iha-mills/heag212-mills/

Figure 3:
This shows an interior of a grind mill in the Hook Norton Brewery, Oxfordshire / The design was fed by a hopper from the floor above which is an aspect of the mill I will be transferring in to the internal structure of my design / Link to book where image was sourced: https://historicengland.org.uk/images-books/publications/iha-mills/heag212-mills/

Figure 4:
A drawing design for a vertical wheel mill that shows an interesting building style which perhaps aspects could be used, however it is a Roman design/ Link to where waterwheel design was sourced: https://www.pinterest.co.uk/geoffreydelacy/waterwheel/

Figure 5:
This is a reconstruction from the dig at Tamworth of an Anglo-Saxon Mill / Link to website where this mill design was sourced: https://regia.org/research/village/acmylen.htm

Figure 6:
This is a drawing of an Anglo- Saxon mill I found on Pinterest which presents both the functionality of a horizontal mill and the style of building from that time period. I have taken inspiration from this for my own design of the mill / Link to where image was sourced: https://www.pinterest.co.uk/pin/367043438379261837/

Figure 7:
A drawing of a tidal mill which was first used during the 7th century in England to make grinding grain in mills easier. / Link to where image was sourced: https://sites.google.com/a/brvgs.k12.va.us/wh-15-sem-1-medieval-europe-gm/the-watermill

Figure 8:
A reconstruction of a fourteenth-century undershot watermill in Dublin, Ireland / I was interested by the design for the hopper and grinder mainly with its support beams, which I will look to incorporate into my design. Link to where image was sourced: https://cora.ucc.ie/bitstream/handle/10468/6734/Rynne2018_%2800000002%29.pdf?sequence=1&isAllowed=y


Figure 9:
An Anglo-Saxon house/ Inspiration for the design of the building exterior of mill / Link to where image was sourced: https://www.pinterest.co.uk/pin/19844054581772802/
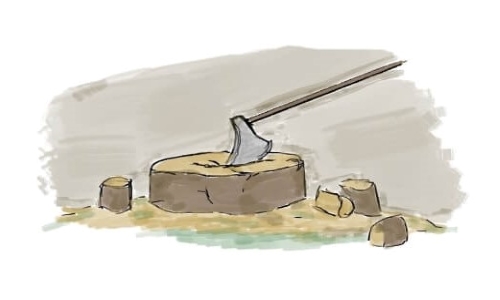
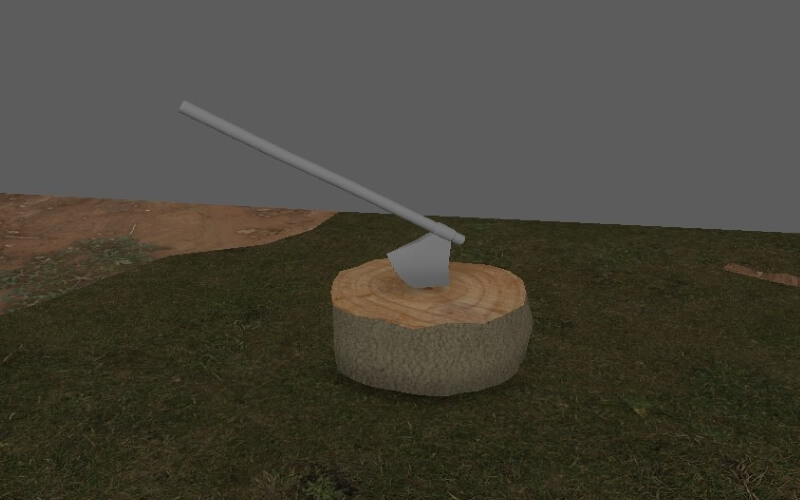
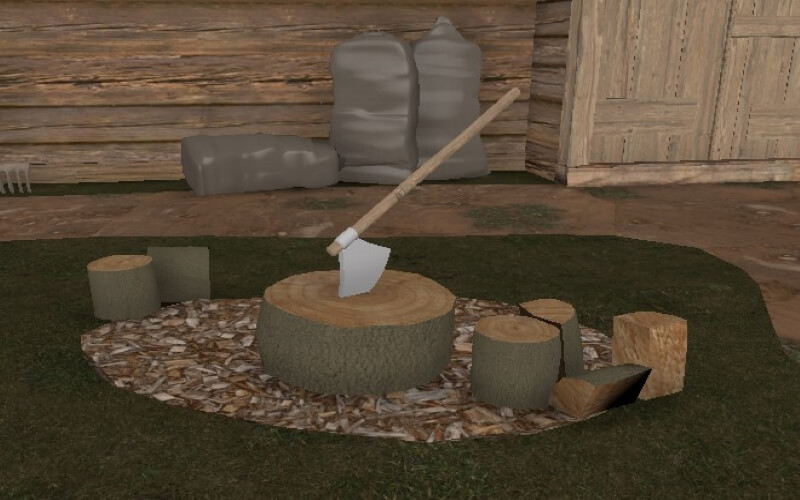
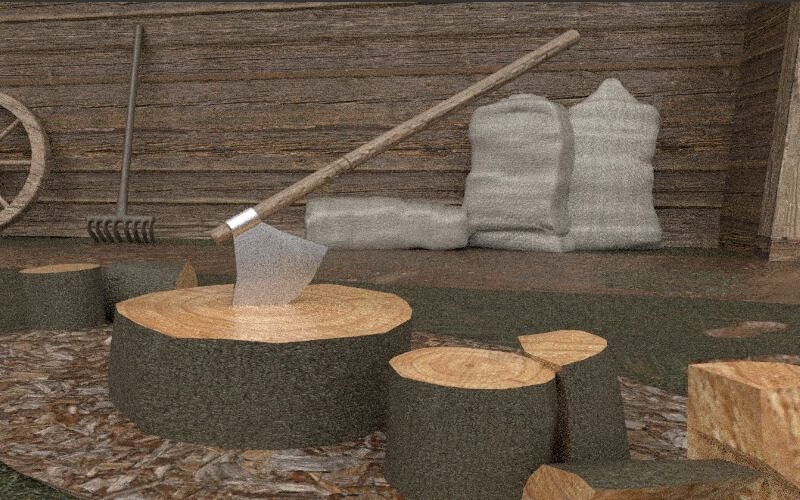
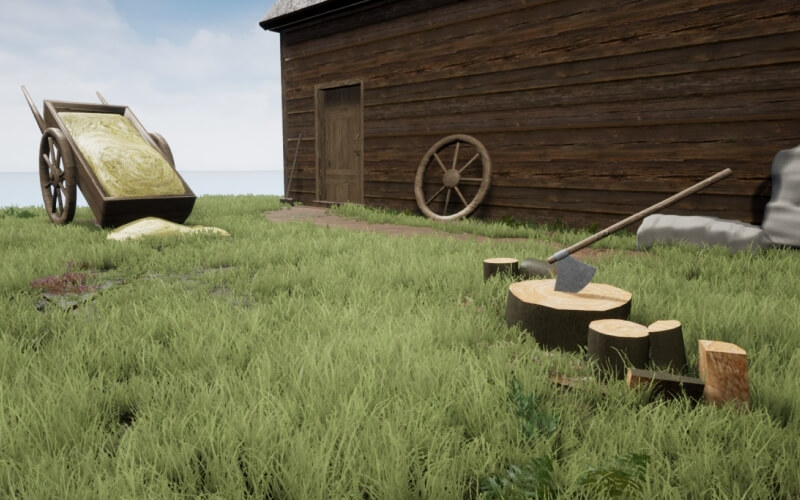
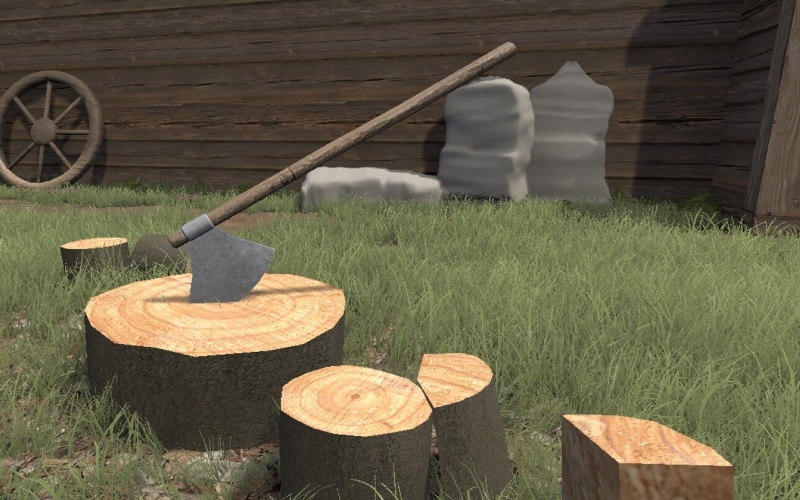
Figure 10:
An axe design that I will be using as reference to build and use in a log splitting scene outside the mill building / Link to where image was sourced:https://pnghut.com/search/anglo-saxon-england
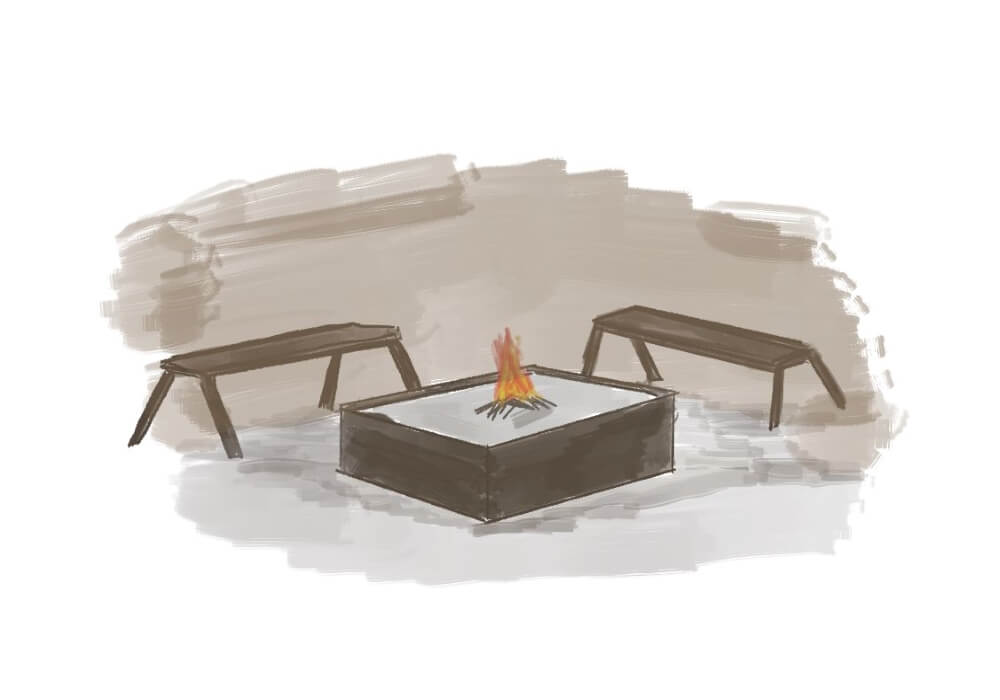
Figure 11:
An Anglo-Saxon house diagram that gives details for what could have been found within a house from that time / This gave me ideas to have a sitting area with benches with a fire pit or box from what the diagram calls it / Link to where image was sourced:https://classroomsecrets.co.uk/anglo-saxon-house/
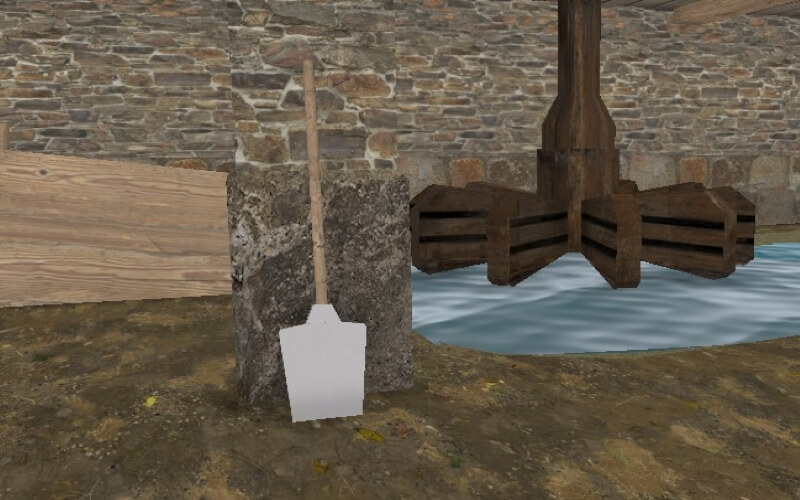
Figure 12:
Reconstructed roman period fire shovels from Gaul. / I will be using these as reference in a making one as an extra detail and story element to the build / Link to where image was sourced: https://www.pinterest.co.uk/pin/532269249704235483/
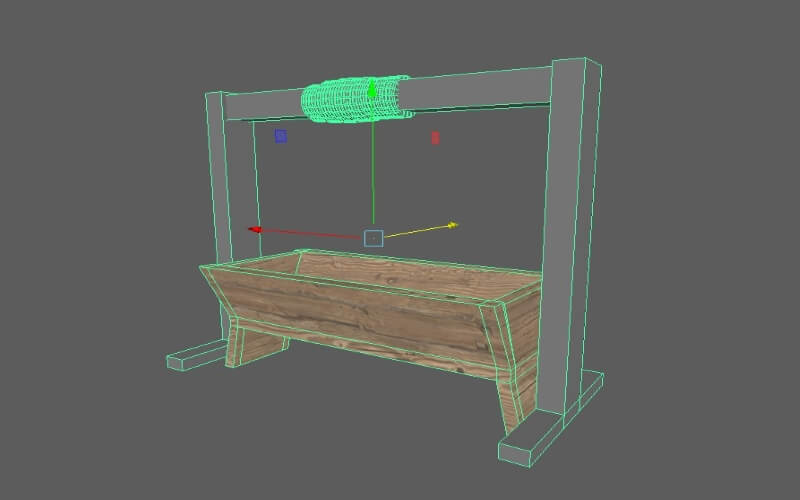
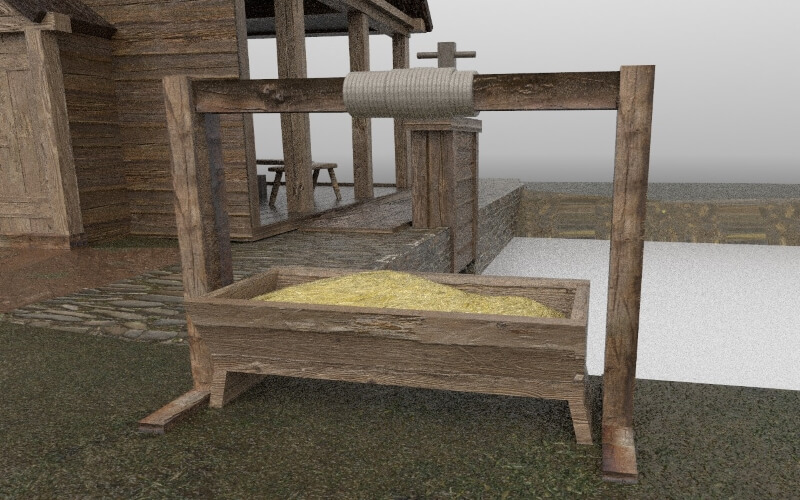
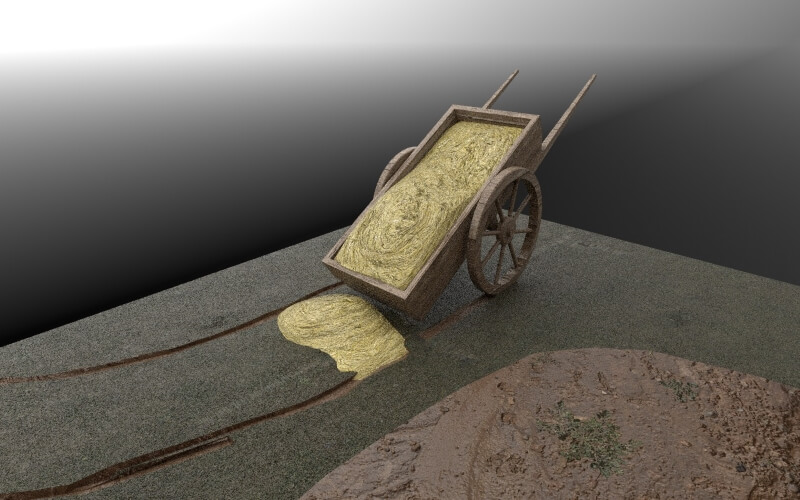
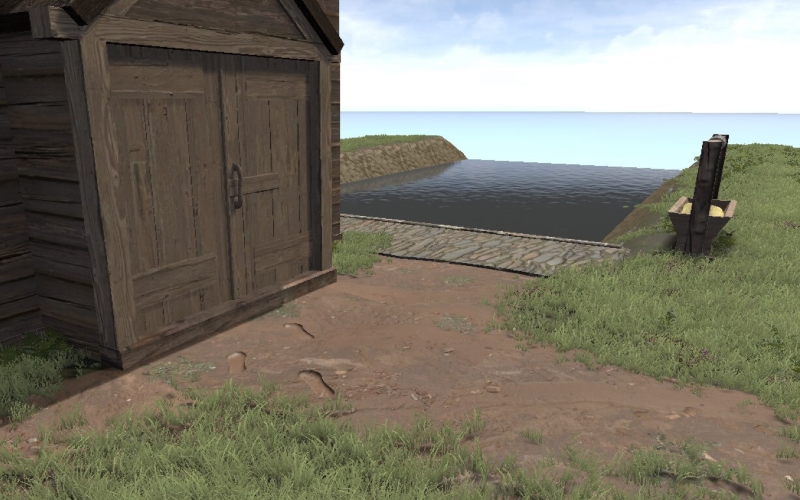
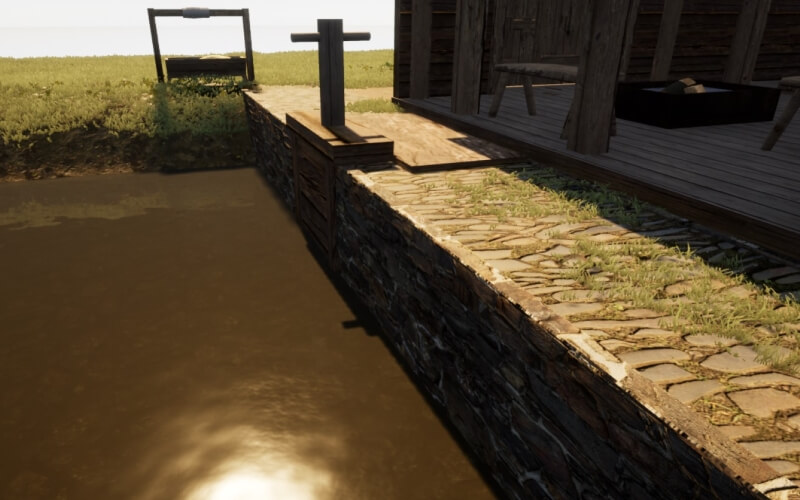
Figure 13:
A horse trough design that I though would add an extra detail to the scene and story of the build / Link to where image was sourced: https://www.eventprophire.com/product/horse-tie-and-trough/
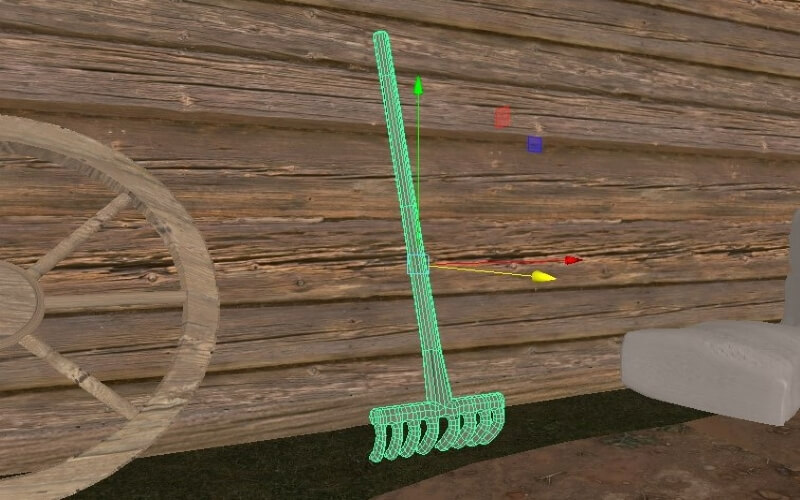
Figure 14:
A simple rake design I will use as reference, however, is not an Anglo-Saxon example due to the steel head making it Early 20th century. The tool would likely have been made of wood / Link to where image was sourced: http://www.oldgardentools.co.uk/catablog-items/rake-f
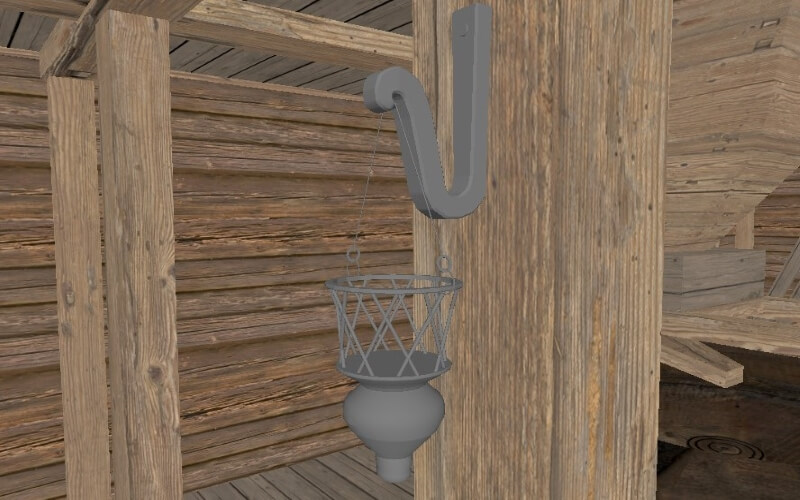
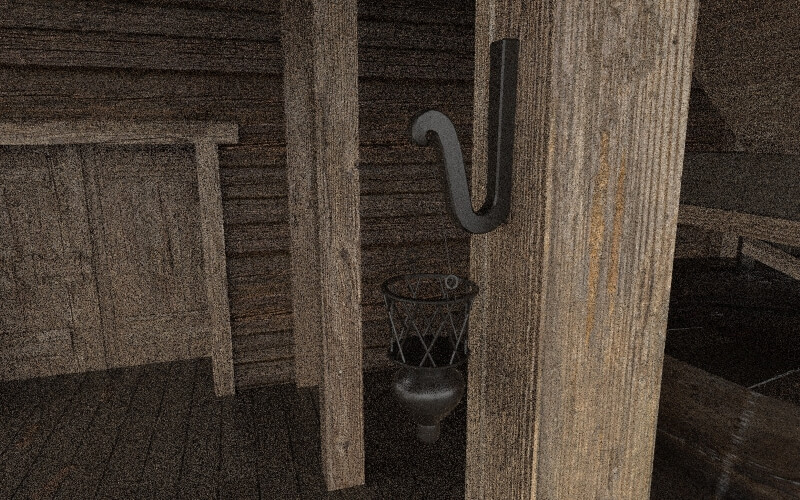
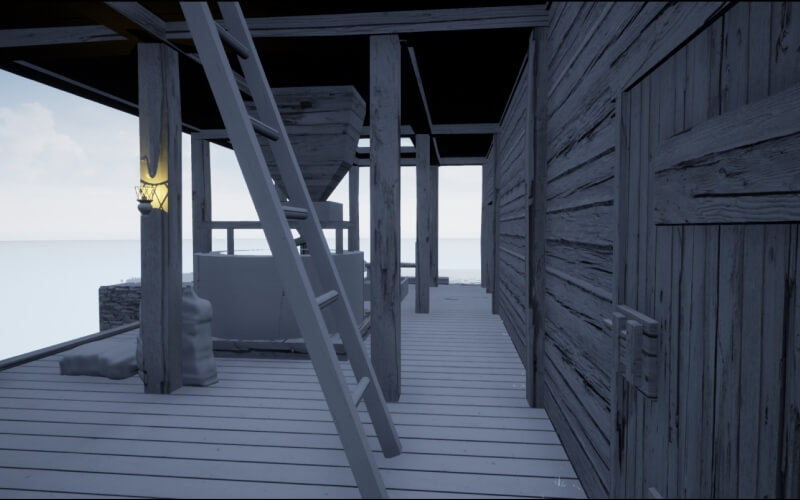
Figure 15:
An Anglo-Saxon hook design that I will take from and use for holding a lantern within the interior of the Saxon mill.
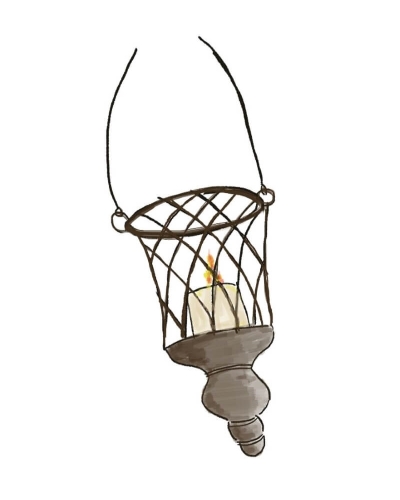
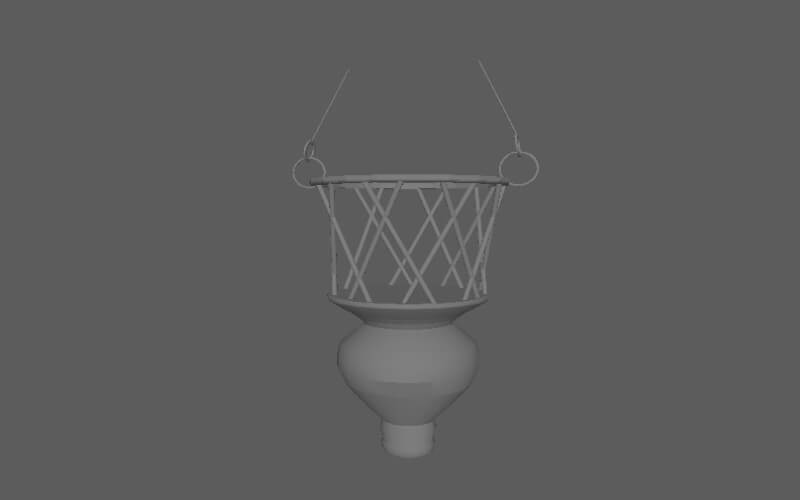
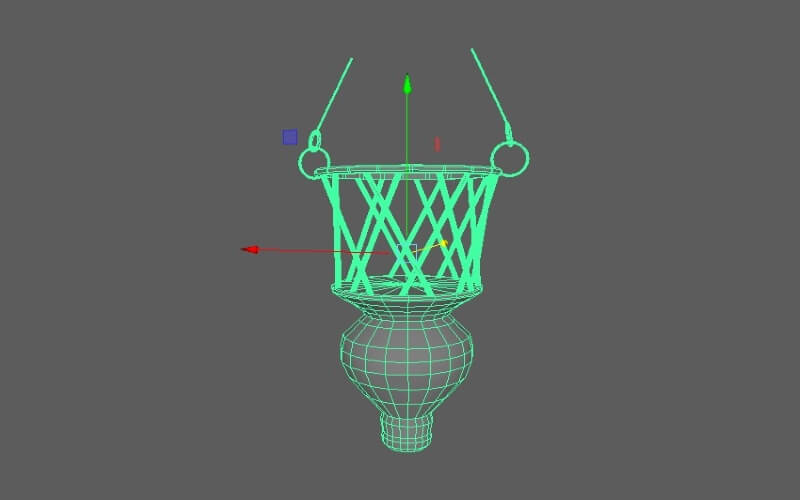
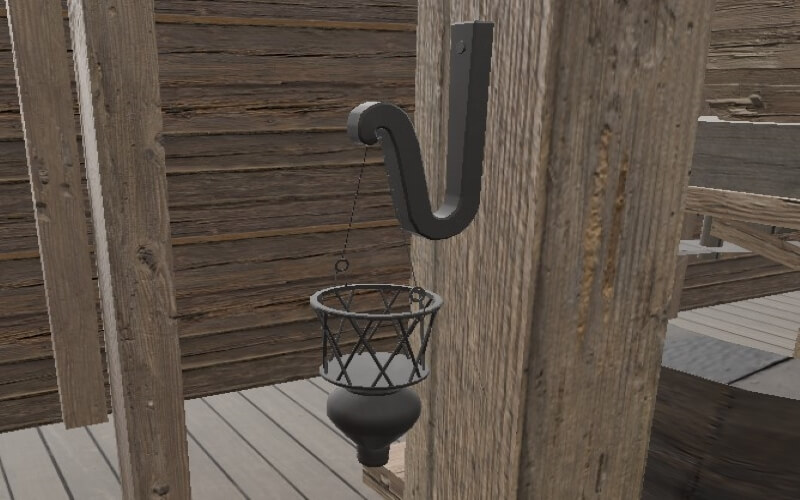
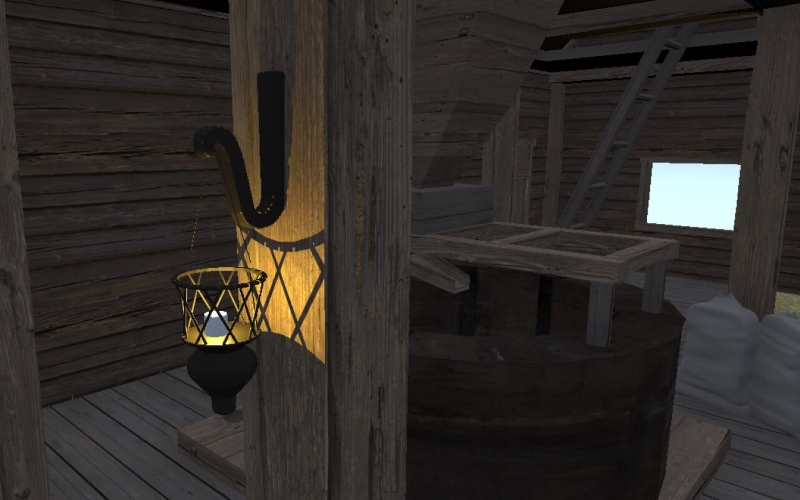
Figure 16:
A lantern design that is an example from the Anglo-Saxon period that I will likely recreate within the mill interior.
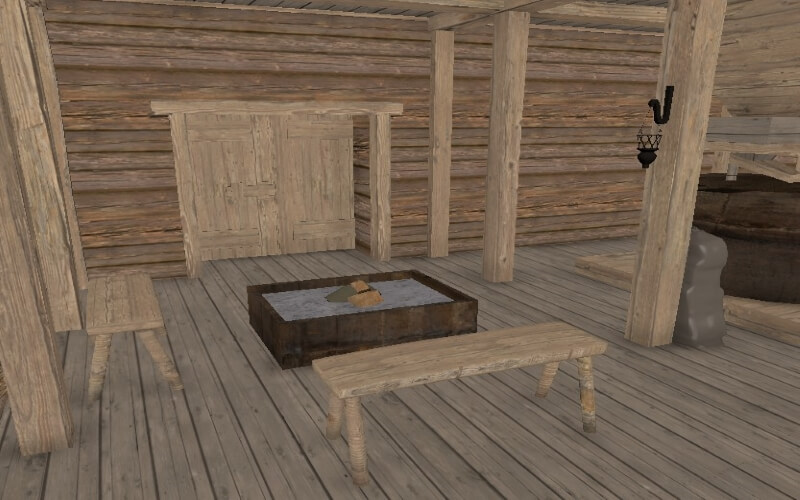
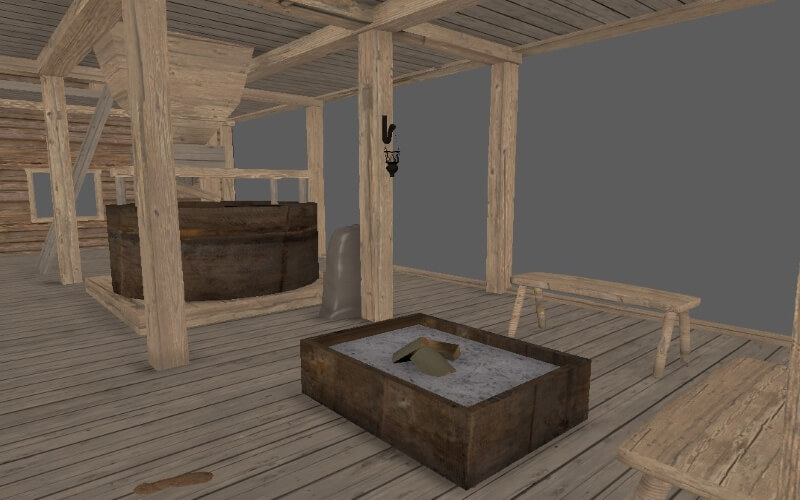
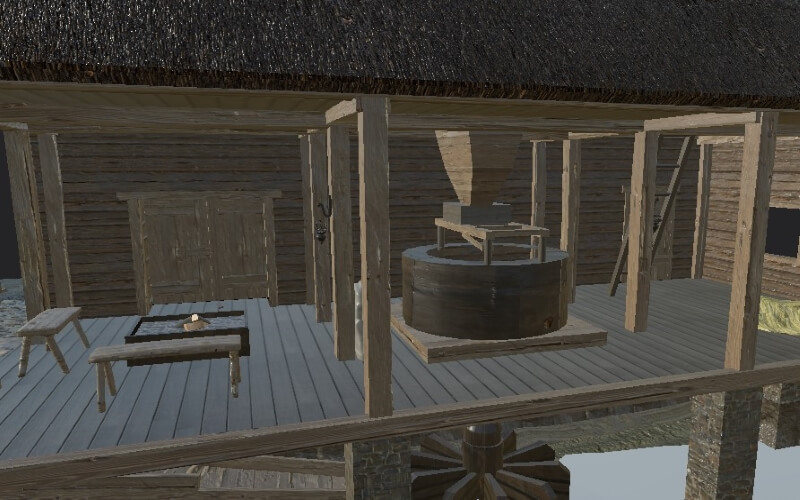
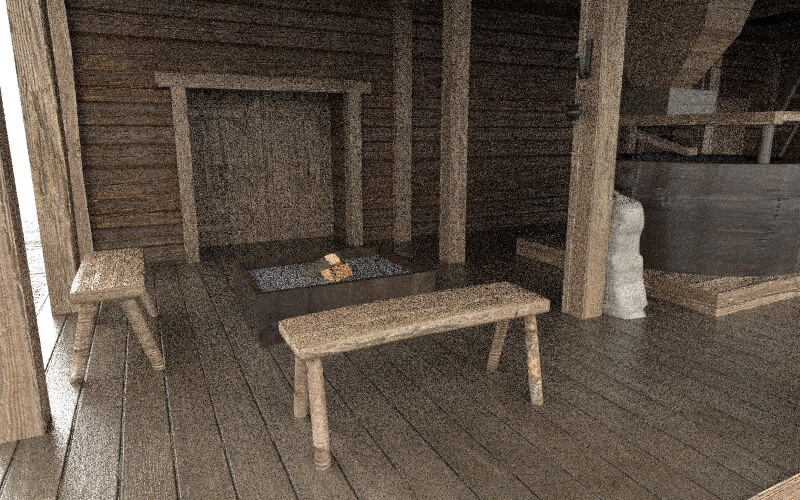
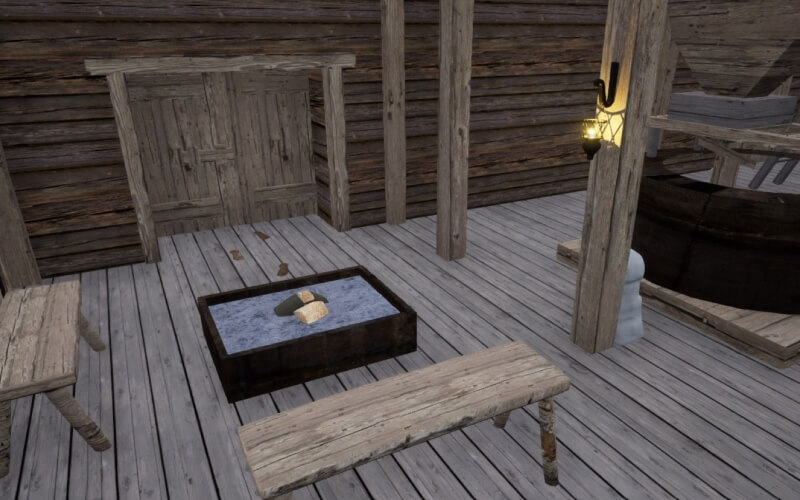
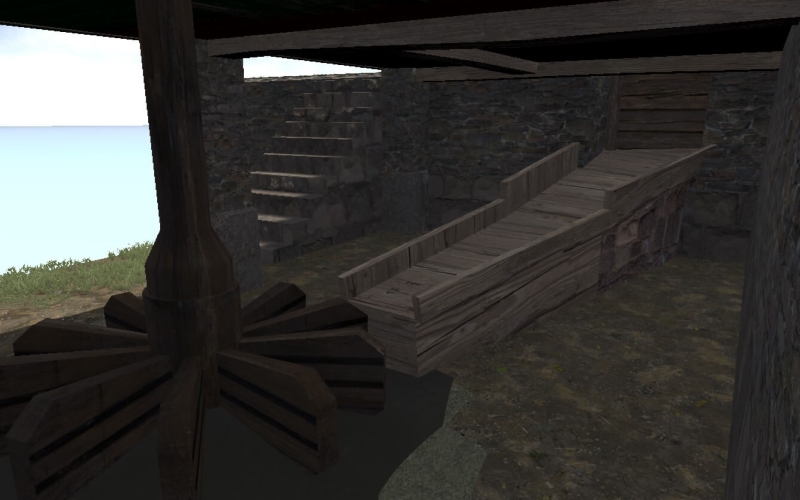
Figure 17:
Firebox in centre of grub house in West Stowe, Anglo- Saxon Archaeology/ An idea for an interior in the mill building. / Link to where image was sourced: http://users.stlcc.edu/mfuller/canterbury/WestStowe.html


3) Drawings / Concept Art

Figure 1

Figure 2

Figure 3

Figure 4

Figure 5

Figure 6

Figure 7


Figure 1:
A 2D diagram showing the internal layout to where key areas of the mill will be placed and how the mill will function.

Figure 2:
Anglo-saxon lantern design

Figure 3:
Log splitting area design

Figure 4:
A design for an area of benches inside the mill with a fire pit/box

Figure 5:
Vertical wheeled mill design

Figure 6:
A diagram for building a vertical water wheel mill with cog system, grinder, and hopper.

Figure 7:
Final Saxon mill building designs that incorporates different design aspect such as the horizontal mill, a hopper system that goes on to another floor to the building and a sluice gate from a canal.


4) Construction of the Mill

Having gathered sufficient research and planned the design for the buildings structure, I jumped into Maya where I worked on the internal parts that make up the functioning of the mill. For the first stage of the build I wanted to make sure that the animations for the mill worked before moving onto the exterior and details of the building.

internel pieces of the mill

mill, sluice gate and floors blocked out

For the animation I wanted it to show the water level change when the sluice gate opens and closes. Once opened you can see the water level drop and the horizontal mill start turning.

Horizontal mill animation

Sluice gate animation

I omitted one half of the external structure of the mill to show one side of the building complete while the other side remaining open to see the internal workings of the mill.

externel structure of mill / Open

externel structure of mill / enclosed


5) Details & Textures

After creating a basic shape for the building and the functioning parts to the mill, I then went on to add aesthetic objects and textures. For example, I made some bags and a horse cart that would have been used to carry and transport the grain in Saxon times. Along with this I looked at finding the textures for the building’s interior and exterior, which involved compiling them from the Quixel Megascan’s library. Later I want to look at taking the textures and adding more detail to them within Substance Painter.

A busy entryway

sacks of grain

Front of Mill & sluice gate

Process of texturing mill

Below building / horizontal mill

blockout complete / textures placed

Along with texturing the building I have also worked on making the surrounding area, by including textures for the ground such as mud, sand, and grass. While doing this I also when about implementing the geometry of the floor by making it more natural and uneven in places.

The river bank details / textures

The brickwork dam & sluice gate

Saxon Mill scene / wireframe

Additional props & textures placed

I have been adding more detail to the building by creating objects from the time period, such as the horse cart, which provide more visual points of interest when looking at the Saxon mill.

Horse cart / Textured

Horse cart / Topology

Throughout the build I have used the UV editor to make the layouts of the different geometry ordered on the texture tiles.

UV edited the scene

warped beam textures

All the beams in the build have been altered differently to make them more warped and unique from one another.

Warped beam geometry

All beams and their differences

wide angle of newly altered beams / open

wide angle of new assets to front of mill / enclosed

I continued to add details to provide more of a story and realism to the building with things such as tools, furniture, and other items from the Anglo-Saxon time.

lantern / shaded

lantern / topolgy

lantern / In scene

horse trough

Wooden Rake

Axe / Log splitting area

wood chips & split logs to add storytelling details

Outer doors

Crude construction technique on display

simple bolt lock system

Horse cart with spilled wheat

Fire box / sitting area

Spade and horizontal mill

front of mill building

As an extra detail I wanted to include a trail of footprints in the muddy path leading from the log cutting area to the fire pit inside the building. I used the Boolean tool in Maya to get the indentations of the footprints on the floor.

Foot prints

Showing where a worker has been

Muddy footprints inside building

interior / back of building

final block out topology / Open

front of building topology / enclosed

Storytelling details together


6) NParticles & Bifrost Fluids

For this section I wanted to learn a new aspect of the software Maya, Nparticles and Bifrost fluids. Then apply this to the mills animation to create moving water, bringing that extra detail to the build. This should help to make the animations flow more seamlessly from one another.

nParticle emitter

nParticle emitter with collision box

Larger nParticles with collision box

Here I have started by learning how the Nparticles systems works in Maya by first creating an emitter. I then looked at changing the direction of the particles by editing the speed at which they fall and move downwards. This was instead of the default of the Nparticles dispersing in multiple directions. After I went on to make a simple collision box so that when Nparticles hit it they will either bounce or roll off and continue falling. I then changed the size of the Nparticles to make it more noticeable, but I would like to take this concept and make it into a fluid for the mill animation.

nParticles applied to the mill animation

nParticles and collider highlighted

Bifrost fluid and collision box

Bifrost fluid and collider

Having tried out both techniques of using Nparticles and Bifrost fluids I decided that a Bifrost emitter would be better suited to the main animation of the mill due to it being easier to create a liquid format from.

Animation test


7) Quixel Mixer

I used Quixel Mixer when I wanted to focus my attention on editing one texture at a time. I would improve the way it looks by changing its colour, adding overlaying texture and making more seamless.

Fabric texture Before edited

Fabric texture After edited

Created Texture maps

The examples here show the before and after of each texture. The fabric texture for the sacks of grain I altered its colour, so it was less shiny and dirtier. Below you can observe the changes to the texture on the model

fabric texture before edited / on model

Fabric texture after edited / on model

Stone texture Before edited

Stone texture After edited

The stonewall was another I though needed changing so that it transitions better from dark to light. It also had areas with what looked like paint in places which needed to be removed. This was done using its painting tools to overlay a colour from another area of the stone texture itself making the whole thing more seamless.

Stone texture before edited / close up

Stone texture after edited / close up


8) Substance Painter

In this section I have taken the textured model that I have created in Maya and imported it into substance painter. There I can edit its textures further by applying the various bump maps to each of them, along with features such as dirt and grunge. This should help to make areas of the textures more seamless and detailed when it comes to producing renders.

Front view / bump map

Rear view / bump map

I first imported the model in as an OBJ and was given a plain white version of the Saxon mill. The texture maps had to been done separately and assigned as textures before applying to the model. All the geometry had been UV mapped in the editor on Maya, so it was just the case of placing the bump maps into the correct slots. The main maps used were the Normal and the ambient occlusion, which even in the black and white version showed the 3D details of each texture.

underneath the mill / bump map

Inside the mill / bump map

Front view / fill layer added

Underneath the mill / Fill layer added

Using the Fill layers on substance painter I was able to include the textures material colours along with adding the normal map again to bring in another level of detail to the Saxon Mill.

Rear view / fill layer development

Interior textures / bump map details

Interior props detail

Interior ground floor development

When all the textures were added to the model, I wanted to begin experimenting with the main painting tools of the software which allows you to edit texture with grunge and dirt layers. Some of the stonewalls are close to water and mud so I wanted to add a layer of dirt to the bottom section of the wall and have the top halve lighter as it become less dirty away from the water. The effect should help to transition from different layers by bridging seams and jumping from light to dark textures.

Before dirt generator was added

After dirt generator was added

I added a generator to the texture that allows you to alter the levels of the dirt layer that is applied to the main texture, in this case the stonewall.

Before edited / paint to be removed

After edited / dirt layer added to texture

While adding new pieces and textures to the build I also created some rendered photos within substance painter, which show the stages of the build and the new content that was added as time went on.

Front view / Render of new materials

Rear view / Render of new materials

At this stage I began including the Anglo-Saxon tools and items I had created into the scene to bring in more visual interest to the environment.

front of Mill building

Log splitting area

Horse trough / rendered new materials

Horse cart & tracks / rendered new materials

Lantern / interior render

fire box & sitting area / interior render

Scene edited and fully decorated / rendered new materials

Wide view / showing canal area work in progress

Substance painter has been a useful tool to learn in this project as it does help to both visualise the 3D model and edit its textures at the same time. It has also meant I could create some rendered photos of the build as I progressed and added elements to the scene. My plan is to take this build further by placing it into an Unreal scene to work on adding details such as different lighting effects.


9) Unreal Engine

I went on to export the 3D model into the Unreal engine and looked at adding foliage such as grass to the scene, in order help hide the seams transitioning from mud to grass. I also wanted to use it to incorporate different lighting options, by including candle lights inside the building where I have added lanterns and changing the colour and direction of light onto areas of the model.

Front view / Grass, water and lighting details added to scene

Interior lighting and ambient light

Underneath the mill / Unreal engine

Procedural grass and scene details

Unreal water rendering

Overview of the mill building and canal

interor / detail lighting

interor / normal lighting

internals of mill / normal lighting

internals of mill / detail lighting

Lantern lighting

Log splitting area

Front Door & footprints

Horizontal Mill

Sluice gate & Canal / sunset lighting

canal reflections at sunset

Back door & Path / sunset lighting

Sacks of Grain, ready for processing

Completed scene, with Autumnal tones