Beginner Work.

Lego Character

At the start of the module I began by first learning how to make the basic shapes within the software Maya. The first task was to construct a Lego figure which I followed along during the workshops. This task focused on the poly modelling tools in Maya. Having only used 3D software such as CAD this was a challenge for me, as the controls were very different from the one’s I have experienced using. Maya also includes a larger variety of 3D tools which I have learnt and developed on during this course.

lego1
lego2

Wine Glass

After learning about poly modelling, we then looked at the tools in the curves/surfaces section on Maya to create a wine class. I drew out a 2D outline of one side of a wine glass with the curved line tool and then mirrored it using the cylindrical UV setting to generate the 3D model of a wine glass.

Haunted House

In the 3rd week I was tasked with building a model of the house shown in the images to the side, within an hour of the workshop. This task was to see our approach to building in Maya using the tools we have learnt over the two weeks. The house has a very unusual shape which made this very challenging. In my attempt to build this I decided to split the shape into three sections with the bottom floor, first floor and Attic/roof.

house
house2
housemodel

Around the World

For this task I made a spinning globe with text wrap. I had to first make the 3d text and then use the bend tool to curve it around the sphere shape. Using the animation bar, I set the timeline to 60 frames for the text to move around the sphere. I did this also for the globe, however made both move in opposite directions to each other. I added colour to the text as well as a texture to the globe.

globe1
globe2
globe3

Scamps & Observations

Here I have put together 5 observation drawings from around the university, each one taking 15 minutes to draw. This was to test my skill in drawing and accuracy in designing within a short amount of time.

Room Interior

For this task I followed a YouTube video, which shows how to create simple details to make the inside of a room. Link to video (OnlineMediaTutor | Maya modeling & animation tutorials! Backface Culling) This room interior I made by first making a cube and then using Back face culling to allow me to see the inside of the cube. The setting will only show the two walls at the back and will change from any side you view it from. For the interior I added columns to one side of the room to make it more interesting along with some boxes that I included a crate texture too.

Animation

I followed this video introduction to animation tools on Maya. Link to video (https://www.youtube.com/watch?v=w-D-zlg00wA) This video introduced me to the timeline tool. Firstly, I made three cubes and placed them in a line on one side of the plane. I then used the timeline tool to move each one at a different speed across the plane within 90 frames.

Deformation

I experimented with the deformation tools bend and lattice to change the shape of a cylinder and a sphere. The bend tool which I used in the around world task, is useful in the way the object can be moved along the curve and not be changed. Though if it were rotated or resized the shape will change depending on the curved line that was created. The lattice tool is interesting as it can be used to pull and distort areas of an object out in any way you want. The tool is very much a way of moulding an object like a piece of clay. The points of the tool will be shown in blue line grid around the shape. The sphere can be moved out of the blue grid which will reverse the deformation of the shape.

3D Logo

Using the globe, I created in the 'around the world' task and the net animation made for the main character of the game, I put together a 3d logo. My aim was to make it so the net would catch the globe, to link with the title of the game that is 'Capture the World'. The globe has been placed to represent one of the letters in the wording and once captured shall be replaced with same text font as the rest of the title.

Castle

After practising with Maya and learning the key tools for the past few weeks, I wanted to test myself by making something more difficult. For this I took the challenge of building a castle, as they have a very intricate design which should test my accuracy and knowledge of the tools. The task helped me learn more about Maya’s various functions and how to best apply them in my work. The images show the stages of the castles design and how the structure first started as a very simple shape and has slowly been added upon in more detail.

Catapult

Flying Car

Website Wireframes

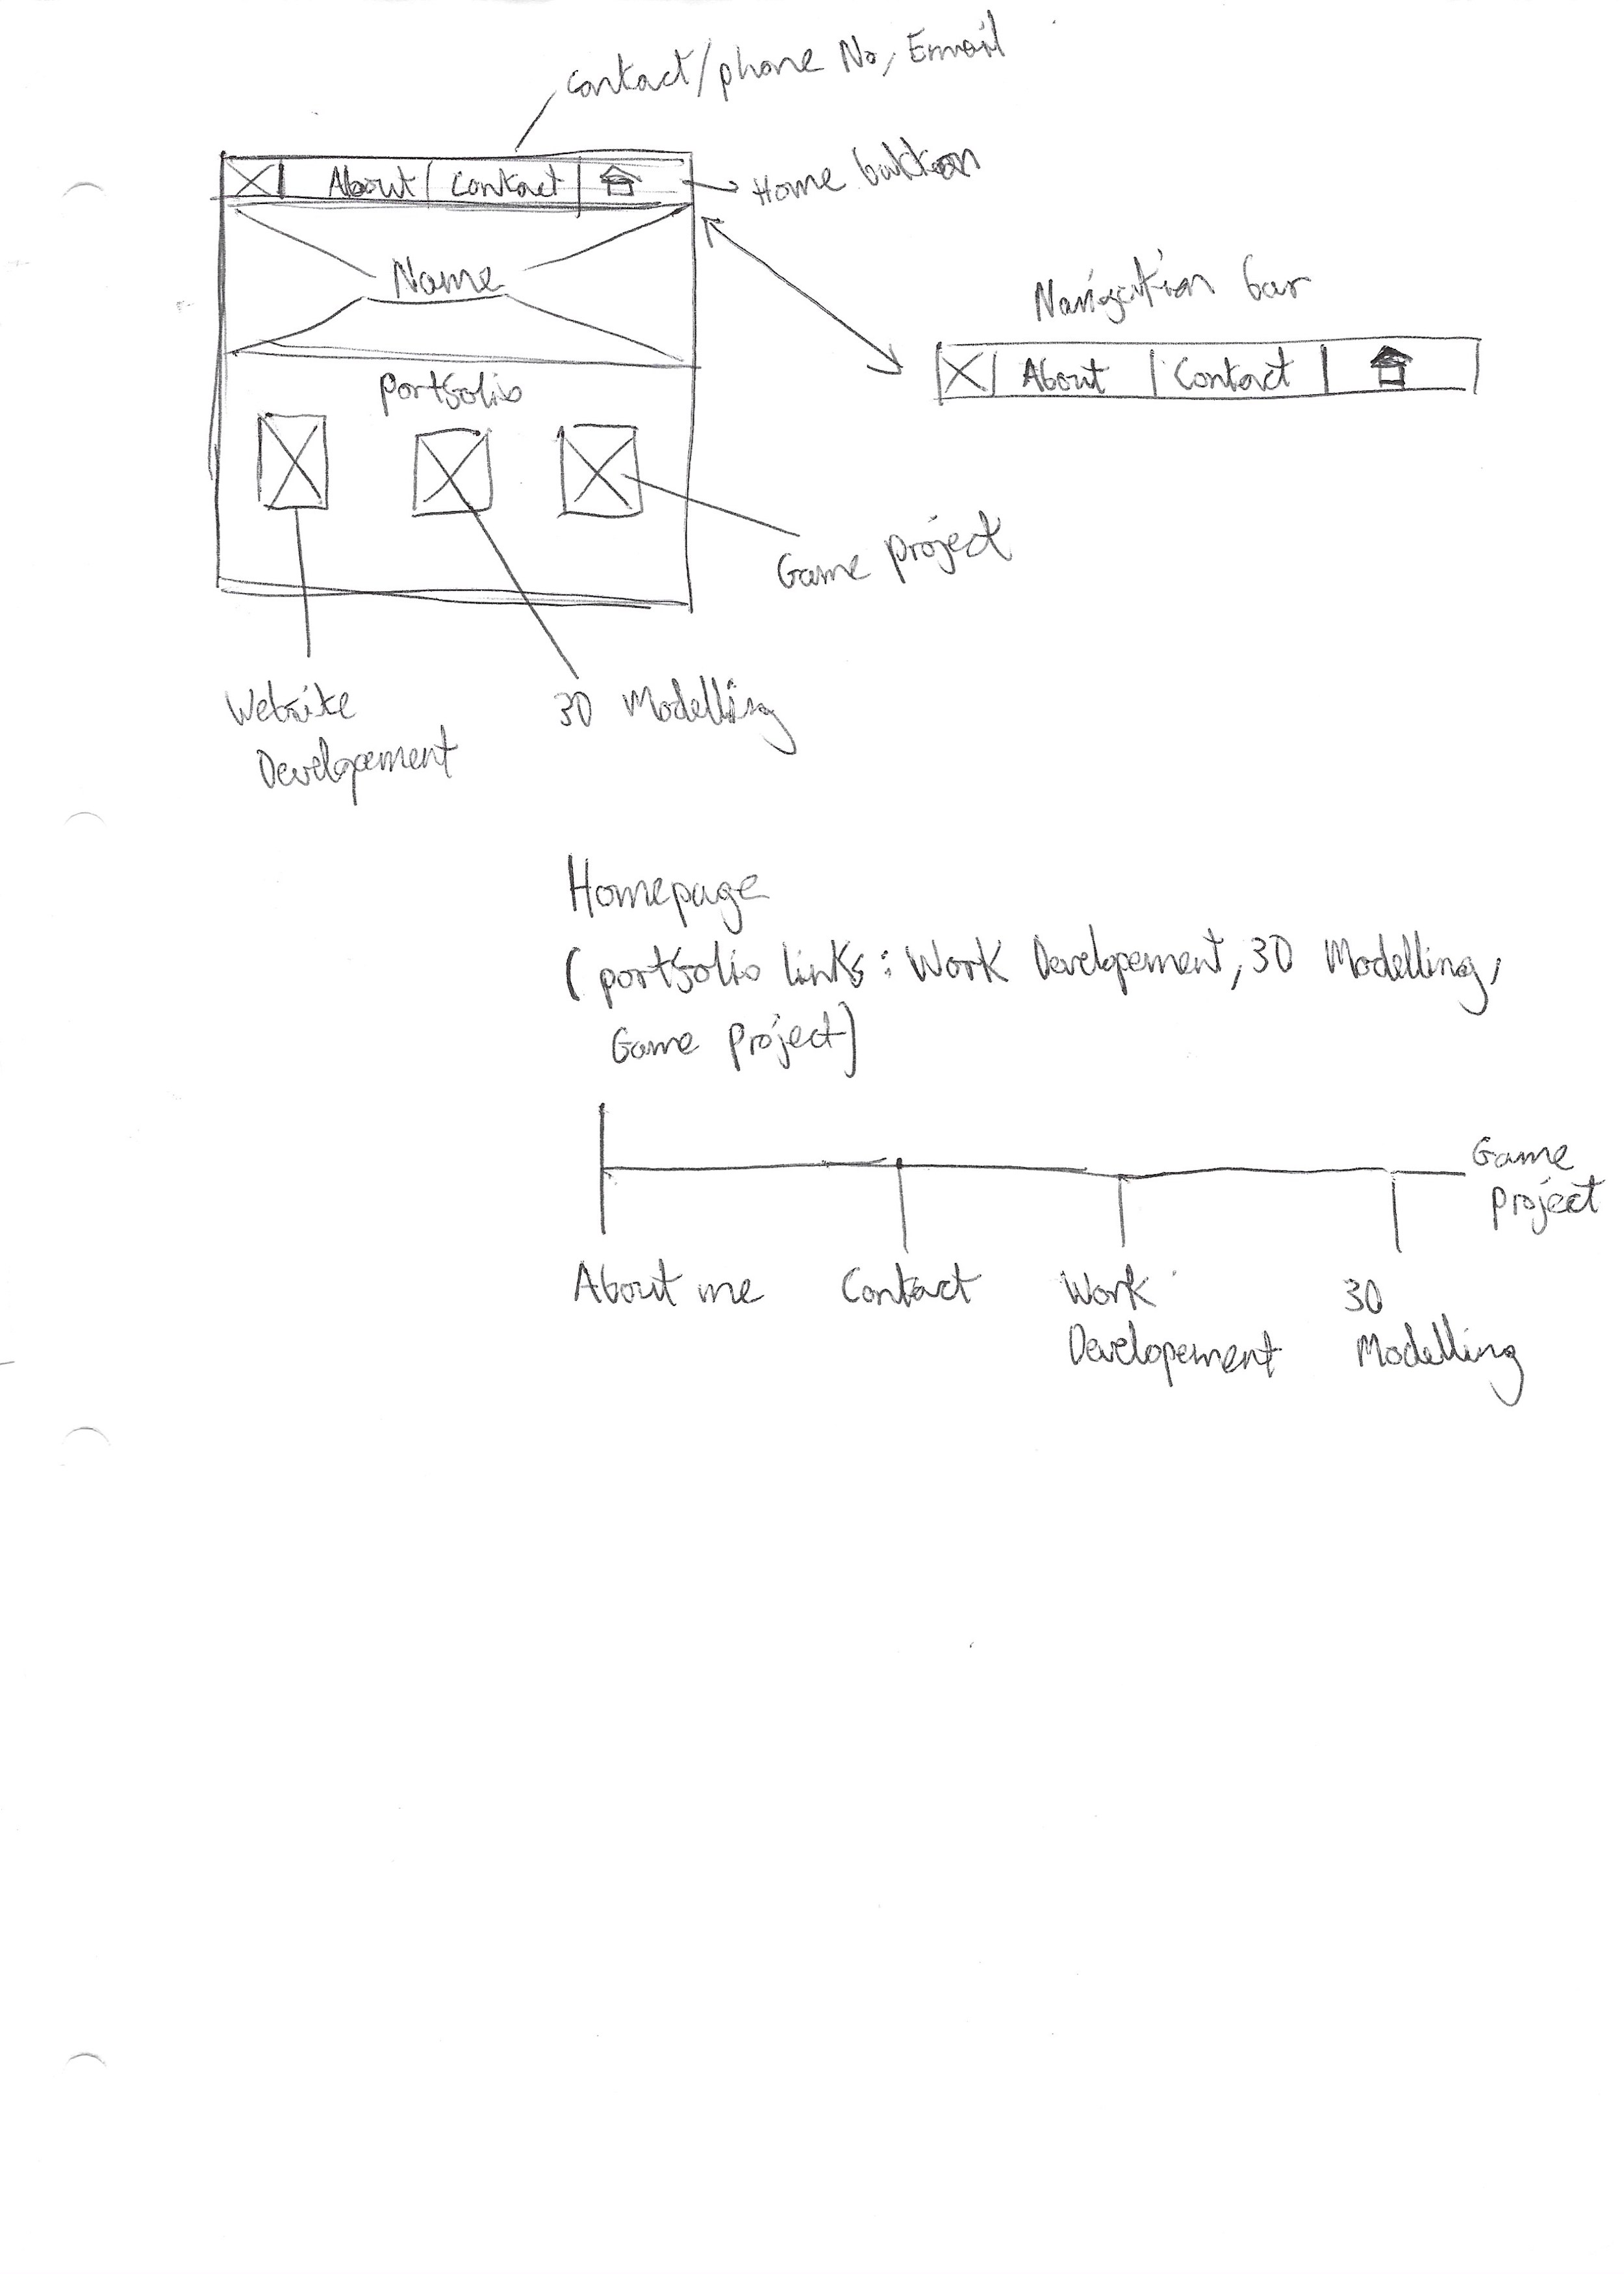
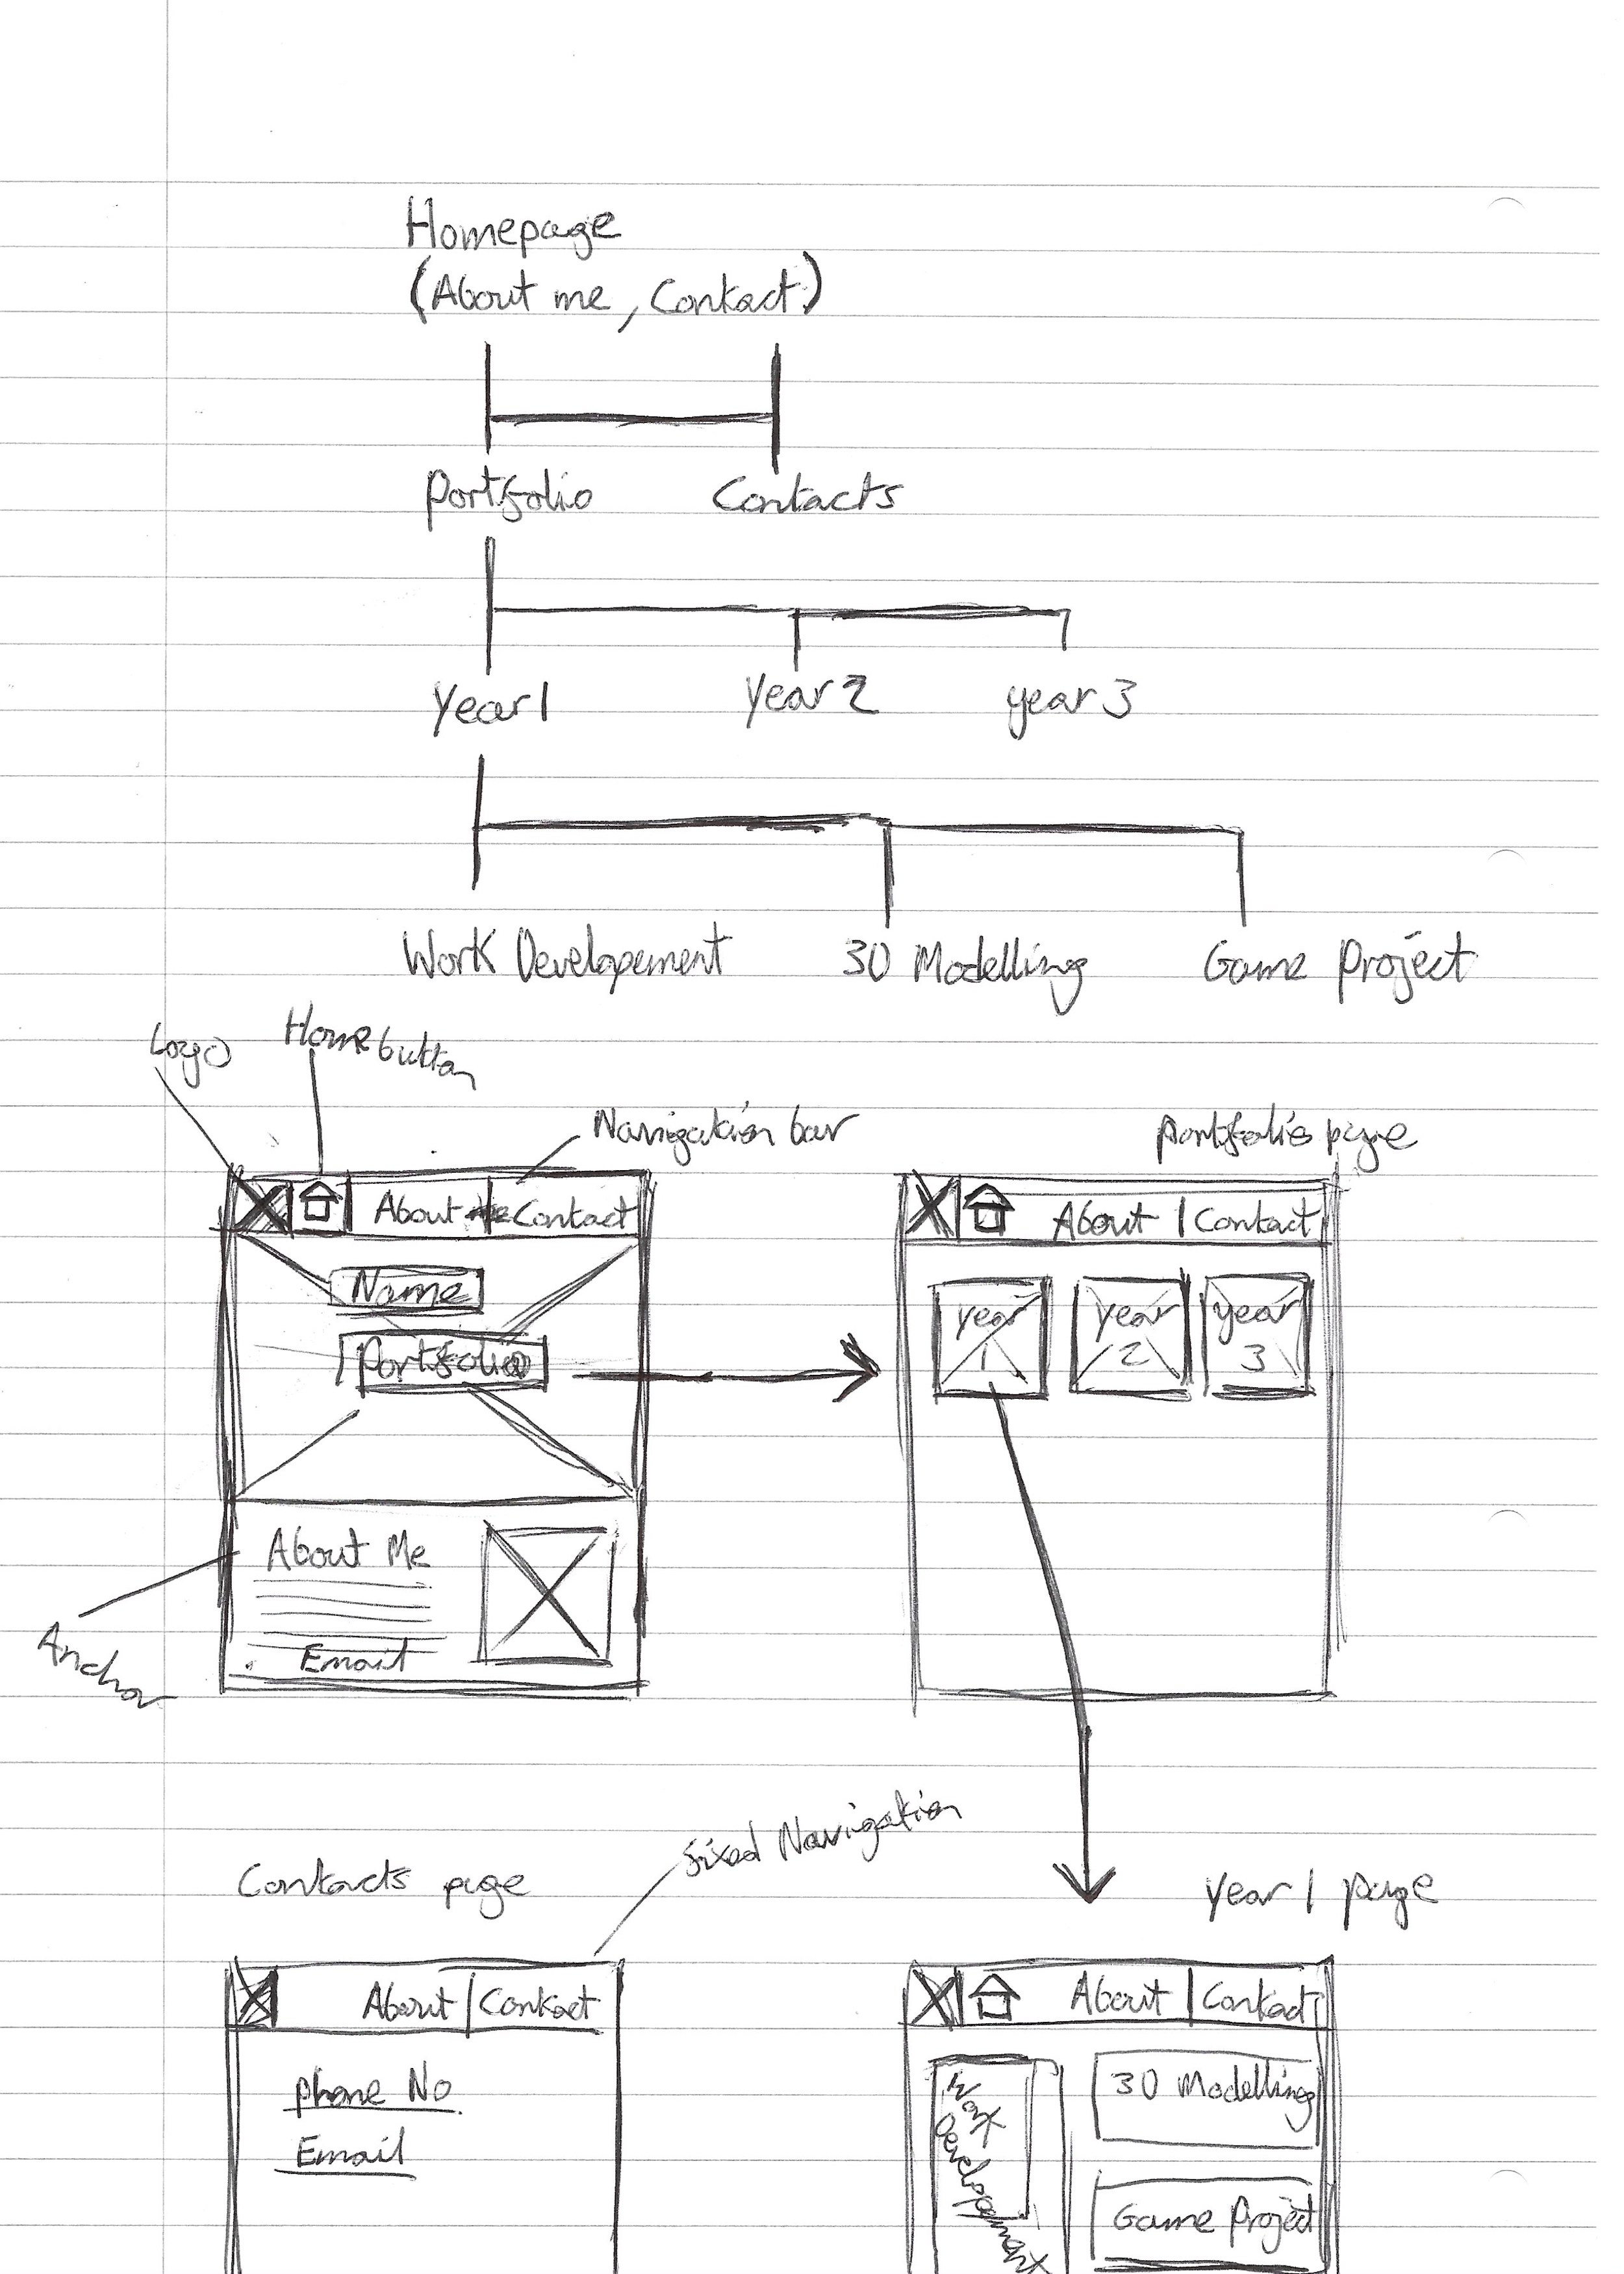
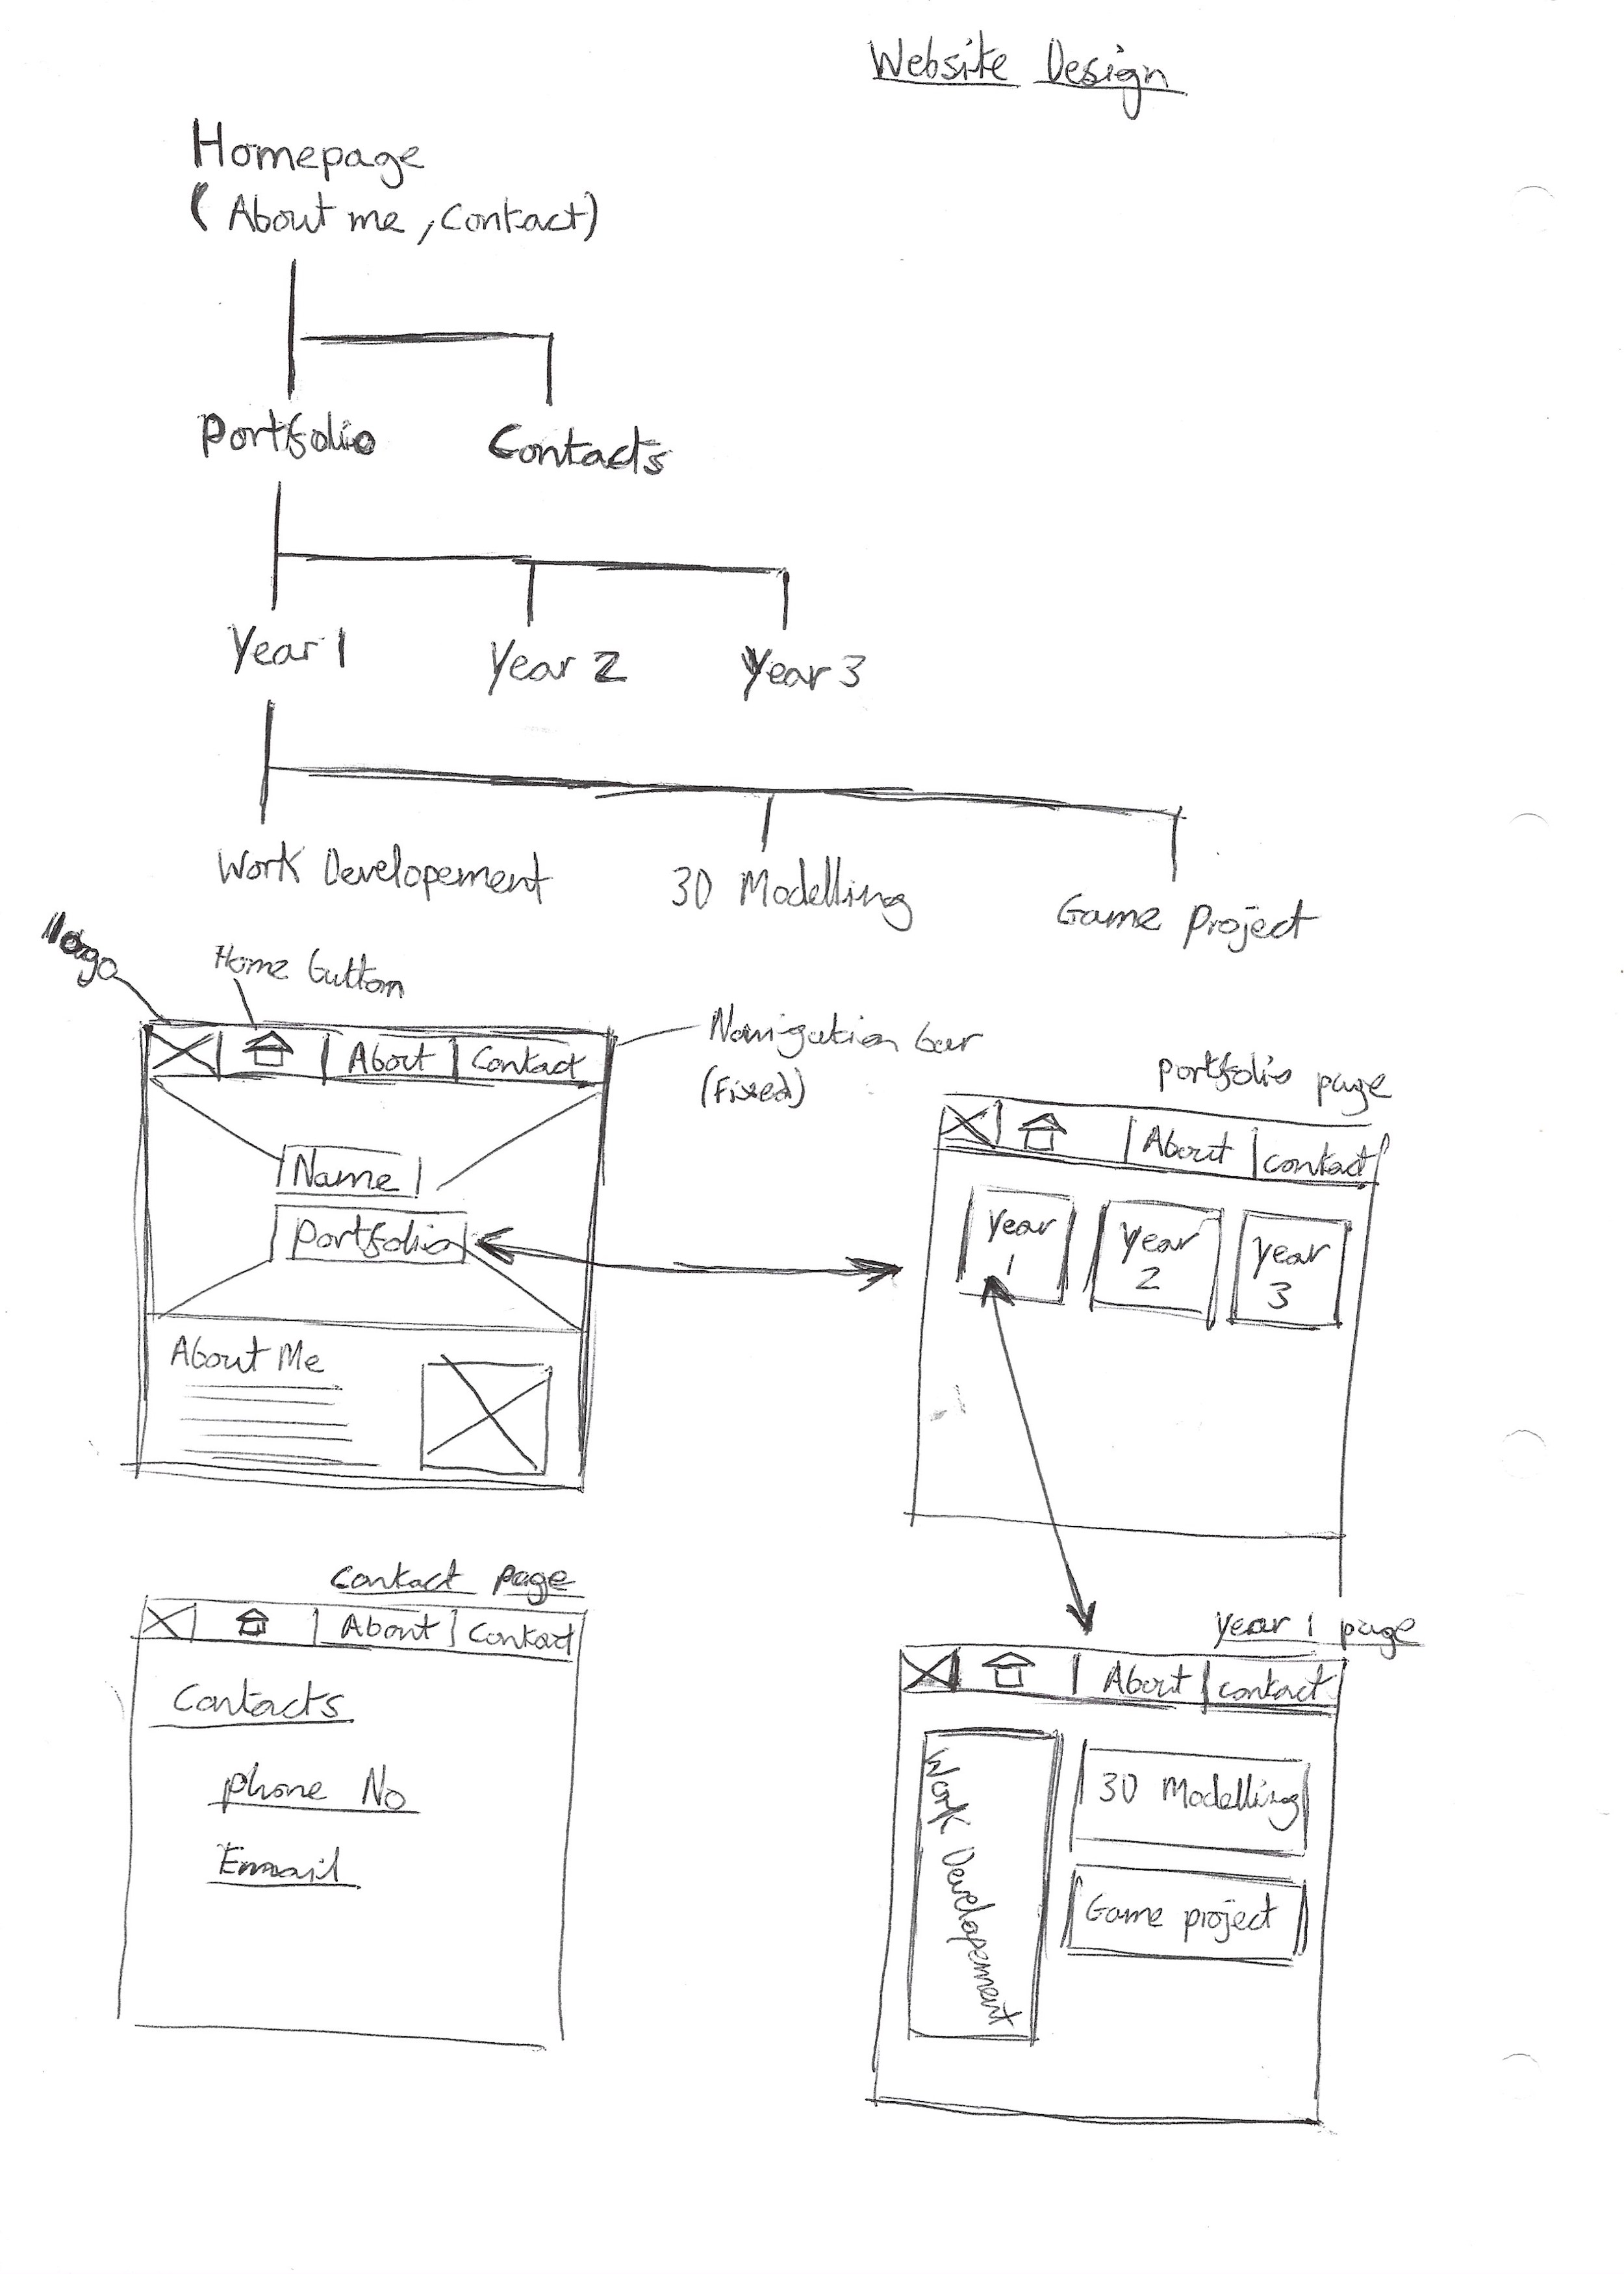
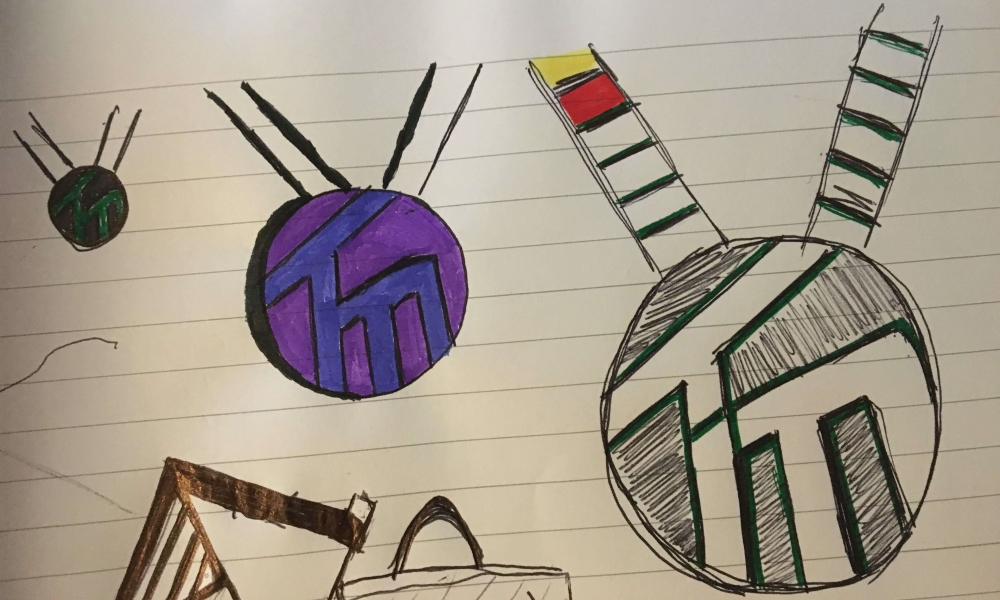
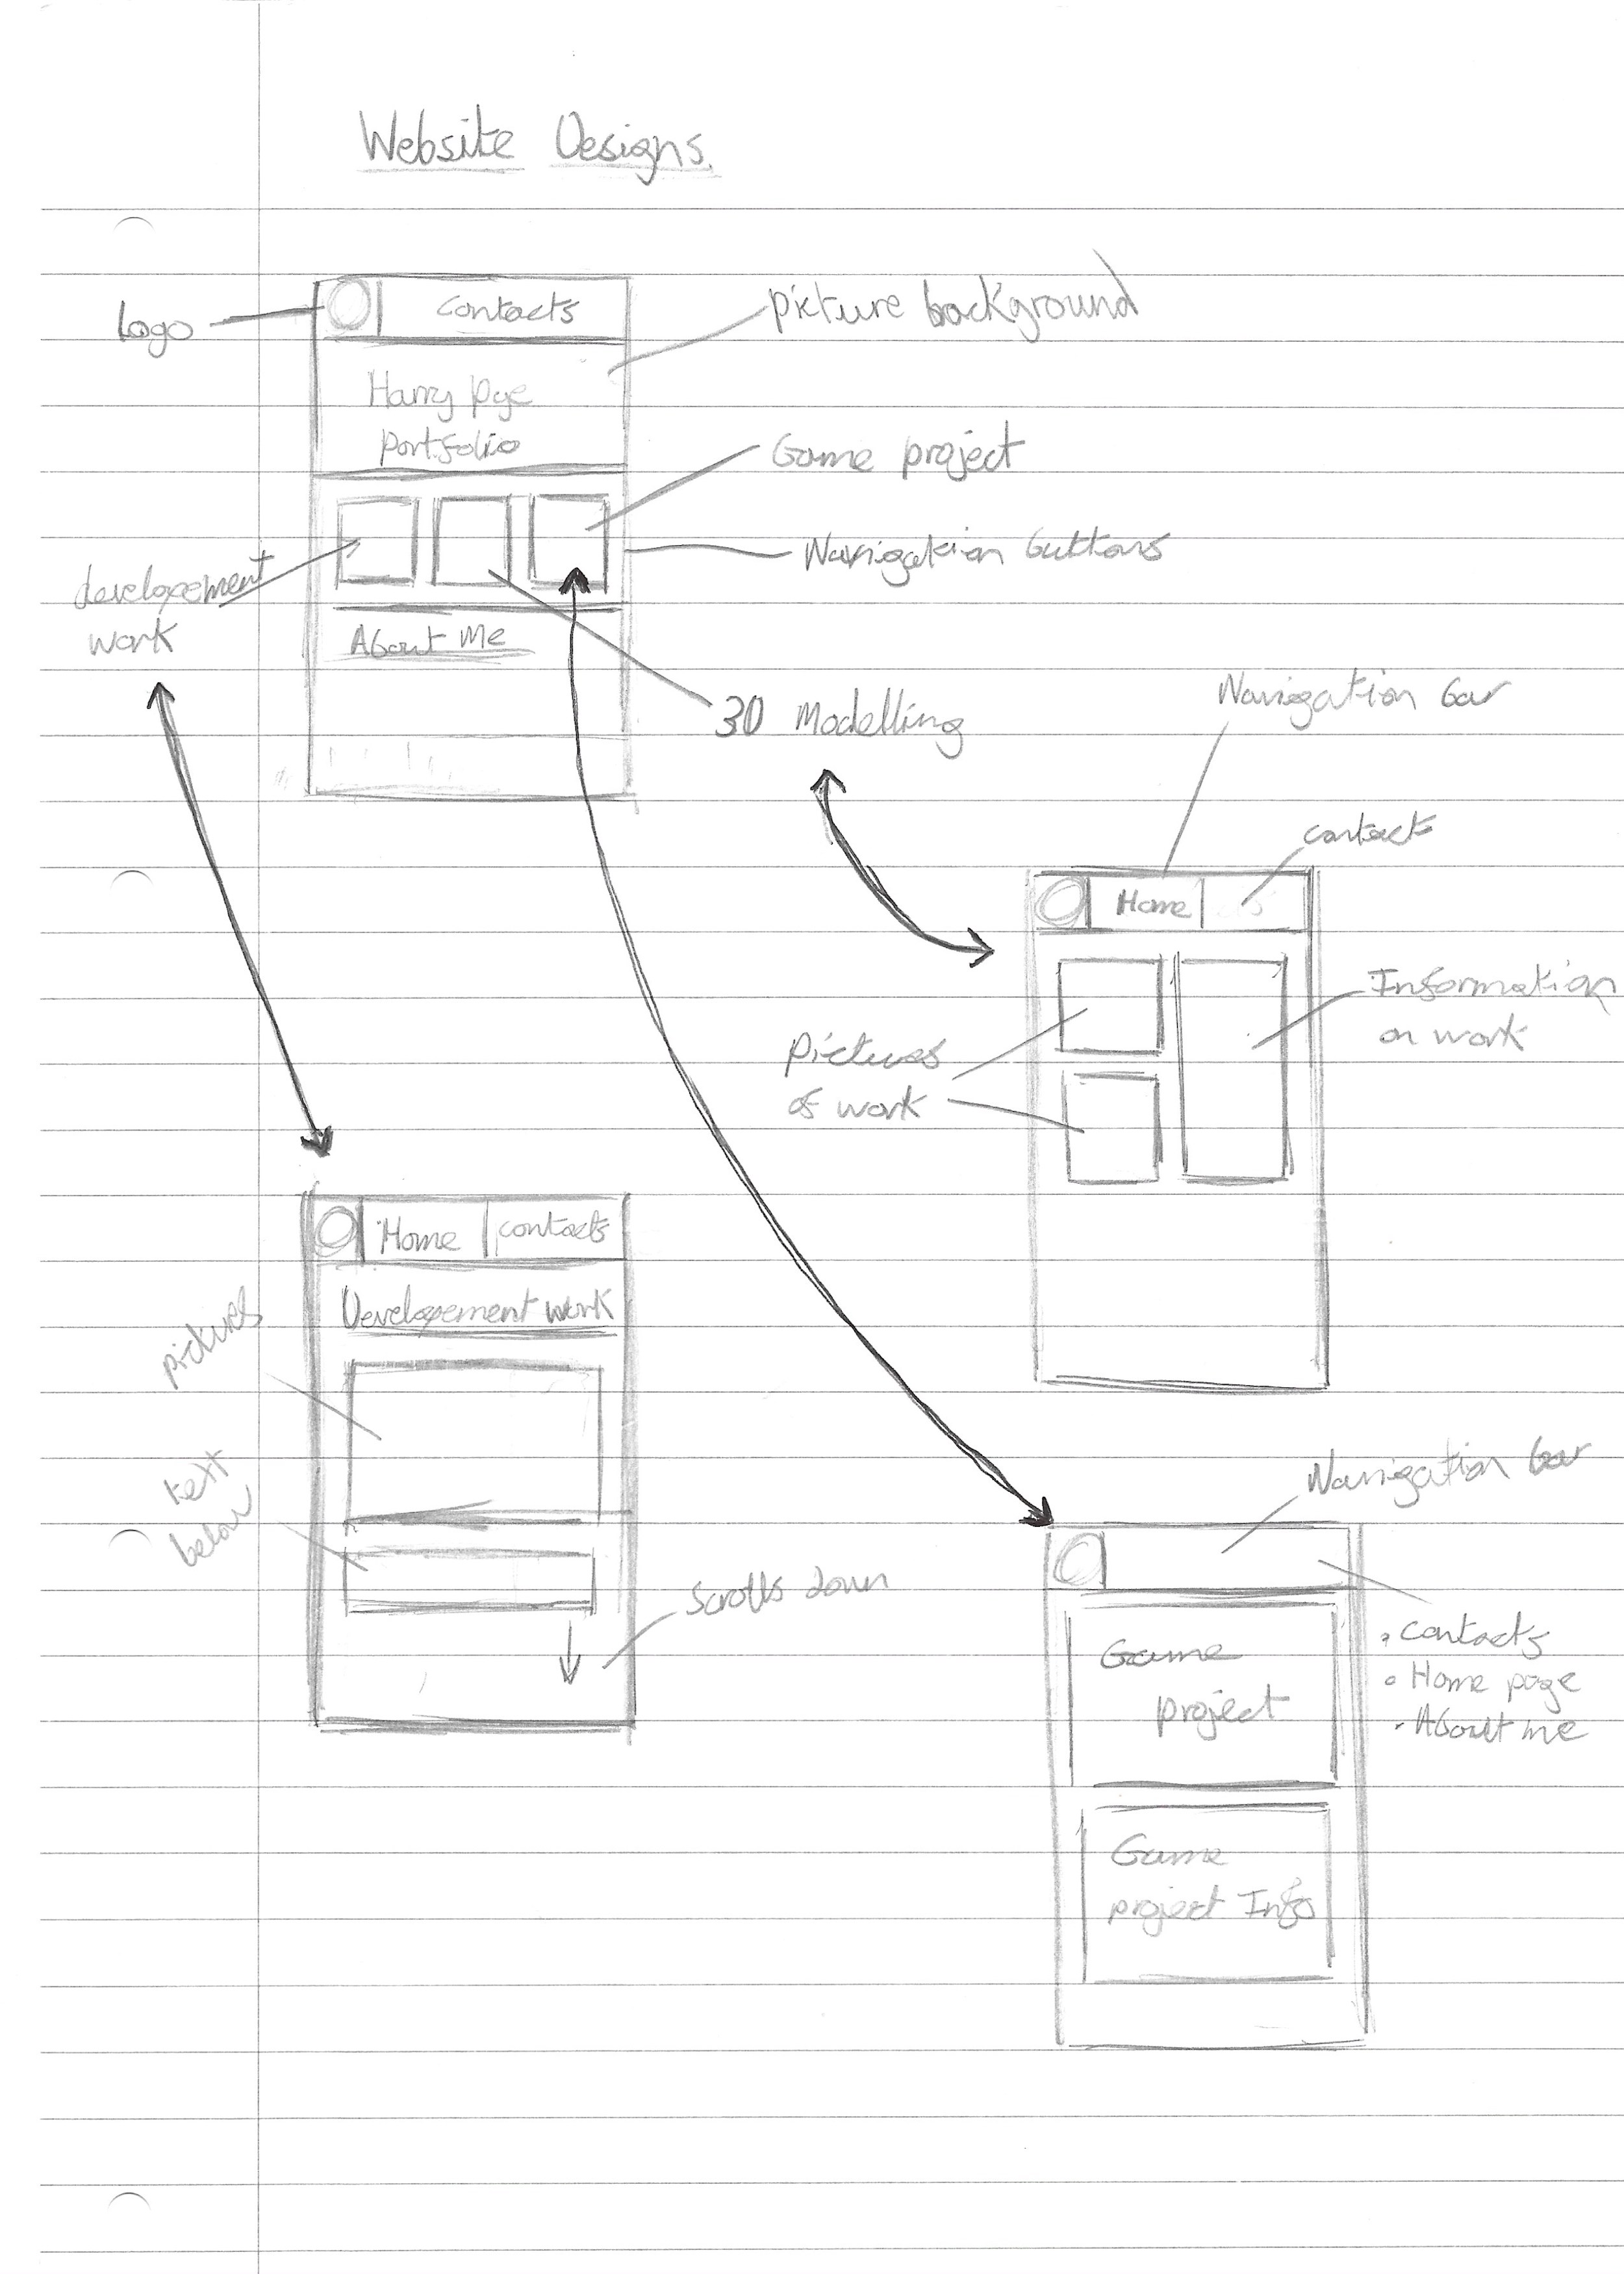
Before developing my website, I put together some wireframes which are shown here. Drawing these helped me to mind map the layout of my website and experiment with how it would function. I wanted to make a webpage that is simple to use, presenting who I am and what I do from the moment someone enters the page. Some of the wireframes include flow diagrams outlining the number of pages and how they link together. This website was built with these drawings in mind but has become a combination of all these ideas. Along with this I also looked at other websites on the internet to gather some more ideas. For example, I looked at Amazon to see what it is that draws customers in. They do this by showing all the current deals on a carousel of photos when you enter the homepage. This is most likely to get the customers attention straight away and makes them stay to look further on their site. Other websites have a simpler set up, like Netflix which only includes a background image and one button in the middle which is telling you to sign up. This being the only thing they want you to do, there is no need for anything else, for all they want is for you to sign into Netflix. From what I found from viewing different websites is that the homepage is best kept simplistic for navigating. To keep people on the page you must present the first thing you want them to see and know about the site. For me it is who I ‘am and what I do as a digital media student.

#

Building a city scene

From Unity, I made a simple city scene by downloading pro builder in the Assets store, which allows you to make simple 3D shapes to construct buildings. This task allowed me to learn more about the functions of Unity and how with certain assets, a 3D scene can be built as if you were using Maya. The aim of making the city scene was mainly to learn the different tools and effects that can be used in Unity. I had a look at the range of lighting that can be put into the scene’s environment, as well as the how the objects placed can be altered by it to emit or reflect depending on the materials used.

Transmedia 2020

For the Transmedia 2020 show, I am working within the 3D printing team. From the start the plan was to create some simplistic designs that can be printed quickly on the day of the event. This led me to designing a medal that can be made and given to the winner of the best interactive project and game.

From the initial designs we received feedback that led us to change the idea to printing something that would be produced during the event and finish at the end of it. Along with this the 3D prints had to relate to the Transmedia, which could be connected to other projects that were being made for the day or through the branding of the event. From this I have built a simple model of a boat that can be printed in pieces and put together. The boat relevance is this that one of the groups is working on a 3D battleship game for their project.

Another idea which was decided on by the group was to create a 3D print of the Transmedia logo, which is a lightbulb with orbiting lines intersecting each other, representing the digital aspects of the course. Below shows my design process for recreating it in 3D using Maya.